Plan every curtain measurement properly

A field guide for ceiling-fit and wall-fit tracks. Confirm the mounting route first, then record the opening, split and drop dimensions in sequence.

Set up your measuring kit

Materials

  • a rigid metal tape measure
  • a stable step ladder
  • a pen and a dimension sheet

Check the opening before you measure

Have you decided how your curtains will be fitted?

Before you measure, it’s worth taking a moment to think about how your curtains will sit in the space. A few small details can make a big difference to the final look.

Check if the room has cornices.

Curtains may be fitted to the wall or tucked neatly inside your cornices on the ceiling, based on the look you prefer.

Check what surface your curtains will be fixed to.

Our curtains can be fixed to most surfaces, but it’s important to check what you’re attaching into before you start. Wall studs and ceiling battens are typically the easiest and most secure fixing points.

Have you considered motorisation?

Enjoy effortless luxury every day with motorised curtains in the project. Silent Glide custom tracks and premium wired or battery-powered motors can suit a wide range of window sizes. Simply add motorisation to the trade order to complete the look.

Wired motors are ideal for new homes or renovations. With help from your electrician, you can plan ahead and keep your motor and cabling discreet.

Get Free Samples Delivered

Nothing beats seeing the fabric in your own home. Order free samples to compare colours, textures and finishes before making your final decision.

Choose the track mounting route

Begin by imagining how your new curtains will transform your space. Select the look, feel, and finish that suits the project, then customise your curtains to fit beautifully and work exactly the way you need.

This guide has you covered for both standard and lined curtains. If you’re working with corner windows, bay windows, or box window setups, we’ve created specialised guides to help with those too. Let’s make selecting and measuring your curtains clear and stress-free.

Select a ceiling fit or wall fit to get started.

Ceiling fit

Track fixed overhead

Use this when the track will mount to the ceiling or inside the cornice for a full-height finish.

Fixing point
Secure into ceiling battens or another suitable structural substrate.
Width reference
Measure wall to wall, or between the exact planned track ends.
Drop reference
Measure from the ceiling or track line to the floor at left, centre and right; use the largest reading.
Wall fit

Track fixed above the opening

Use this when the track will face-fix to the wall, rather than hang from the ceiling.

Fixing point
Secure into wall studs or a suitable concrete, brick, stone or tiled surface.
Width reference
Mark the finished track span, including the required side coverage and stacking space.
Drop & splits
Measure from the planned track height and record any custom split or opening positions from the chosen track start.
Applies to either fit

After choosing the mounting position, the same product options remain available: manual or motorised operation; sheer, blockout, lined or double layers; stack and opening direction; track colour and operation; heading, hem and finished-drop style; and the required wand length.

Choose the installation route, then follow every numbered step in sequence.


Ceiling fit Curtains

Alright, it’s time to start measuring. We’ll guide you through it step by step.

1

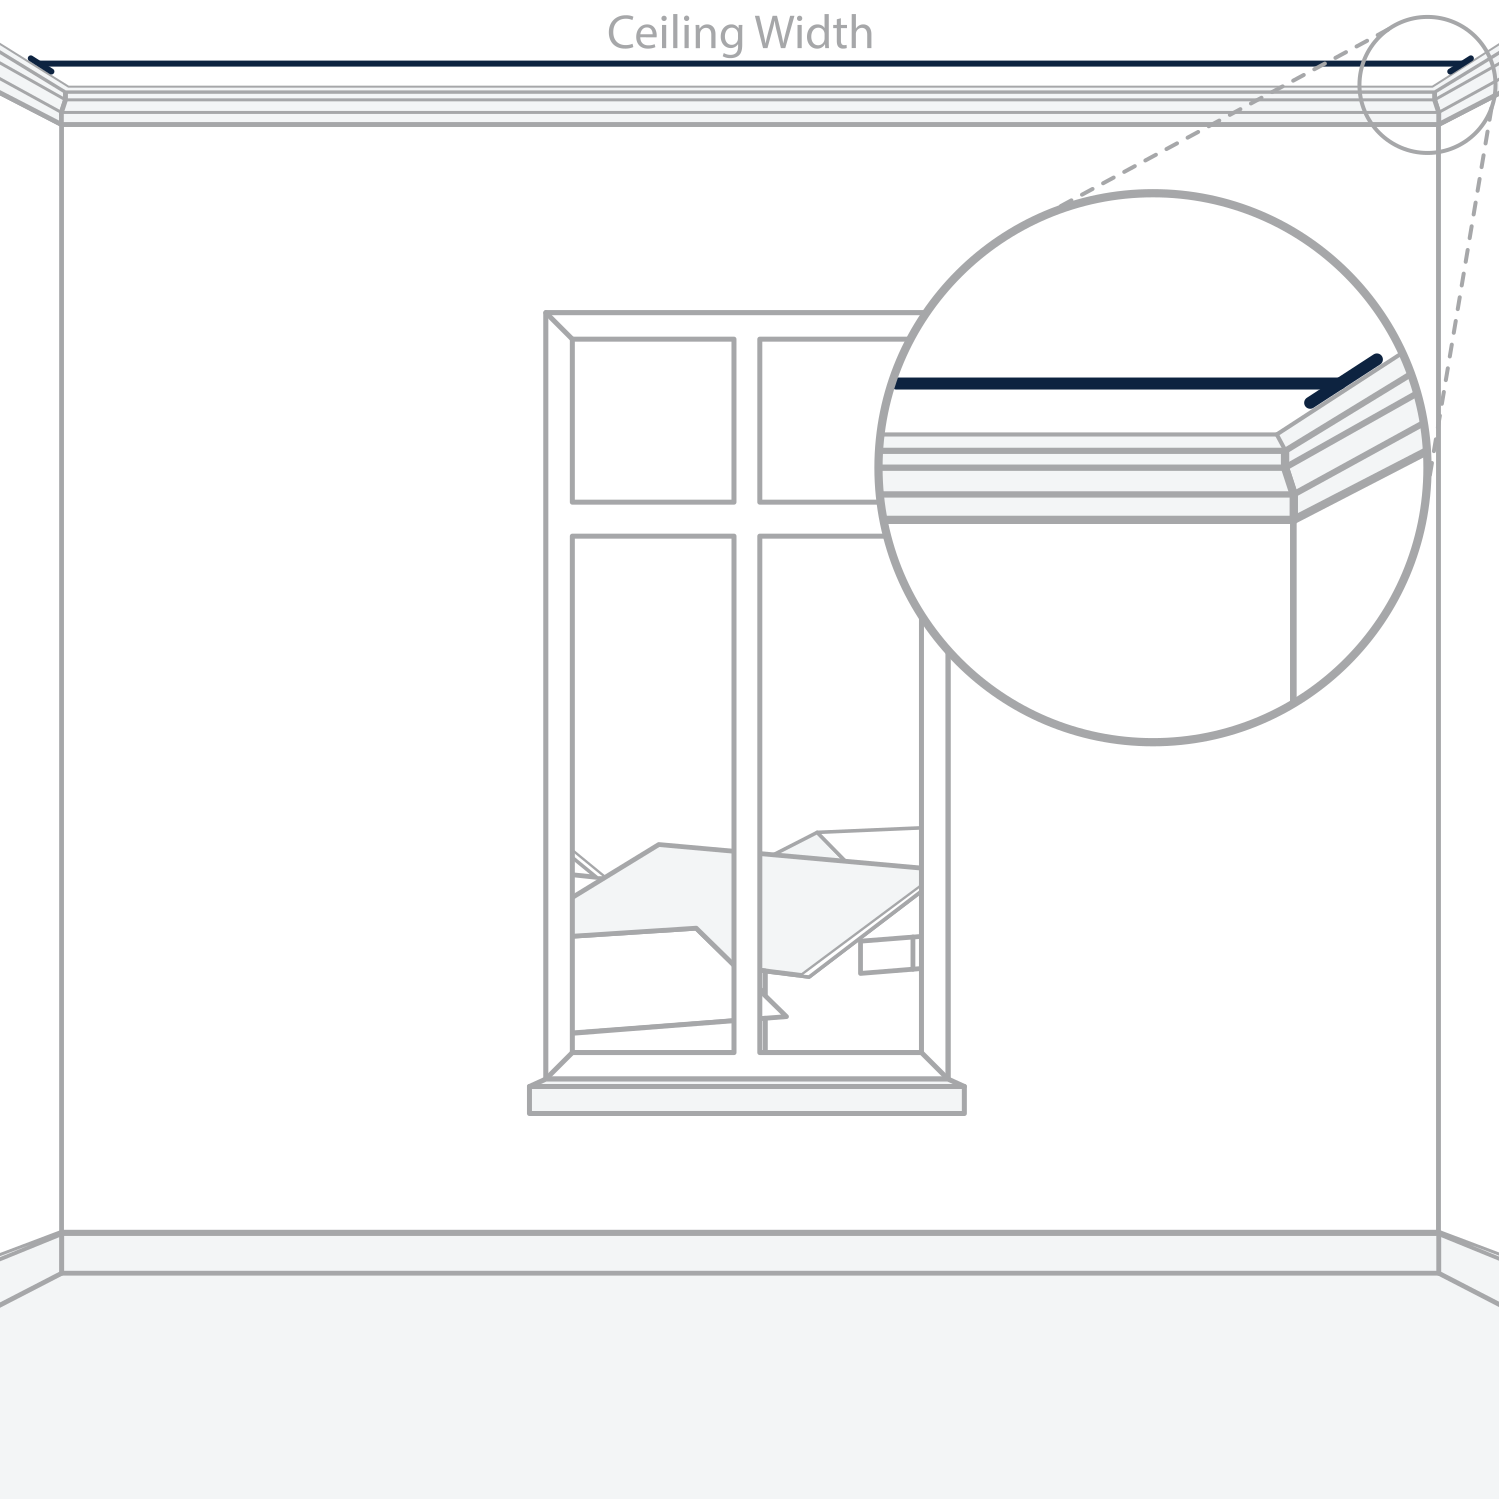
Find Your Width Dimension

Measure the precise width of your ceiling from wall to wall, and write it down. Where the opening has cornices, measure from the inside edge of each cornice. This dimension will be your track width.

You don’t need to measure the fabric width — we’ll calculate this for you according to your track width.

2

Select Your Split Points (Optional)

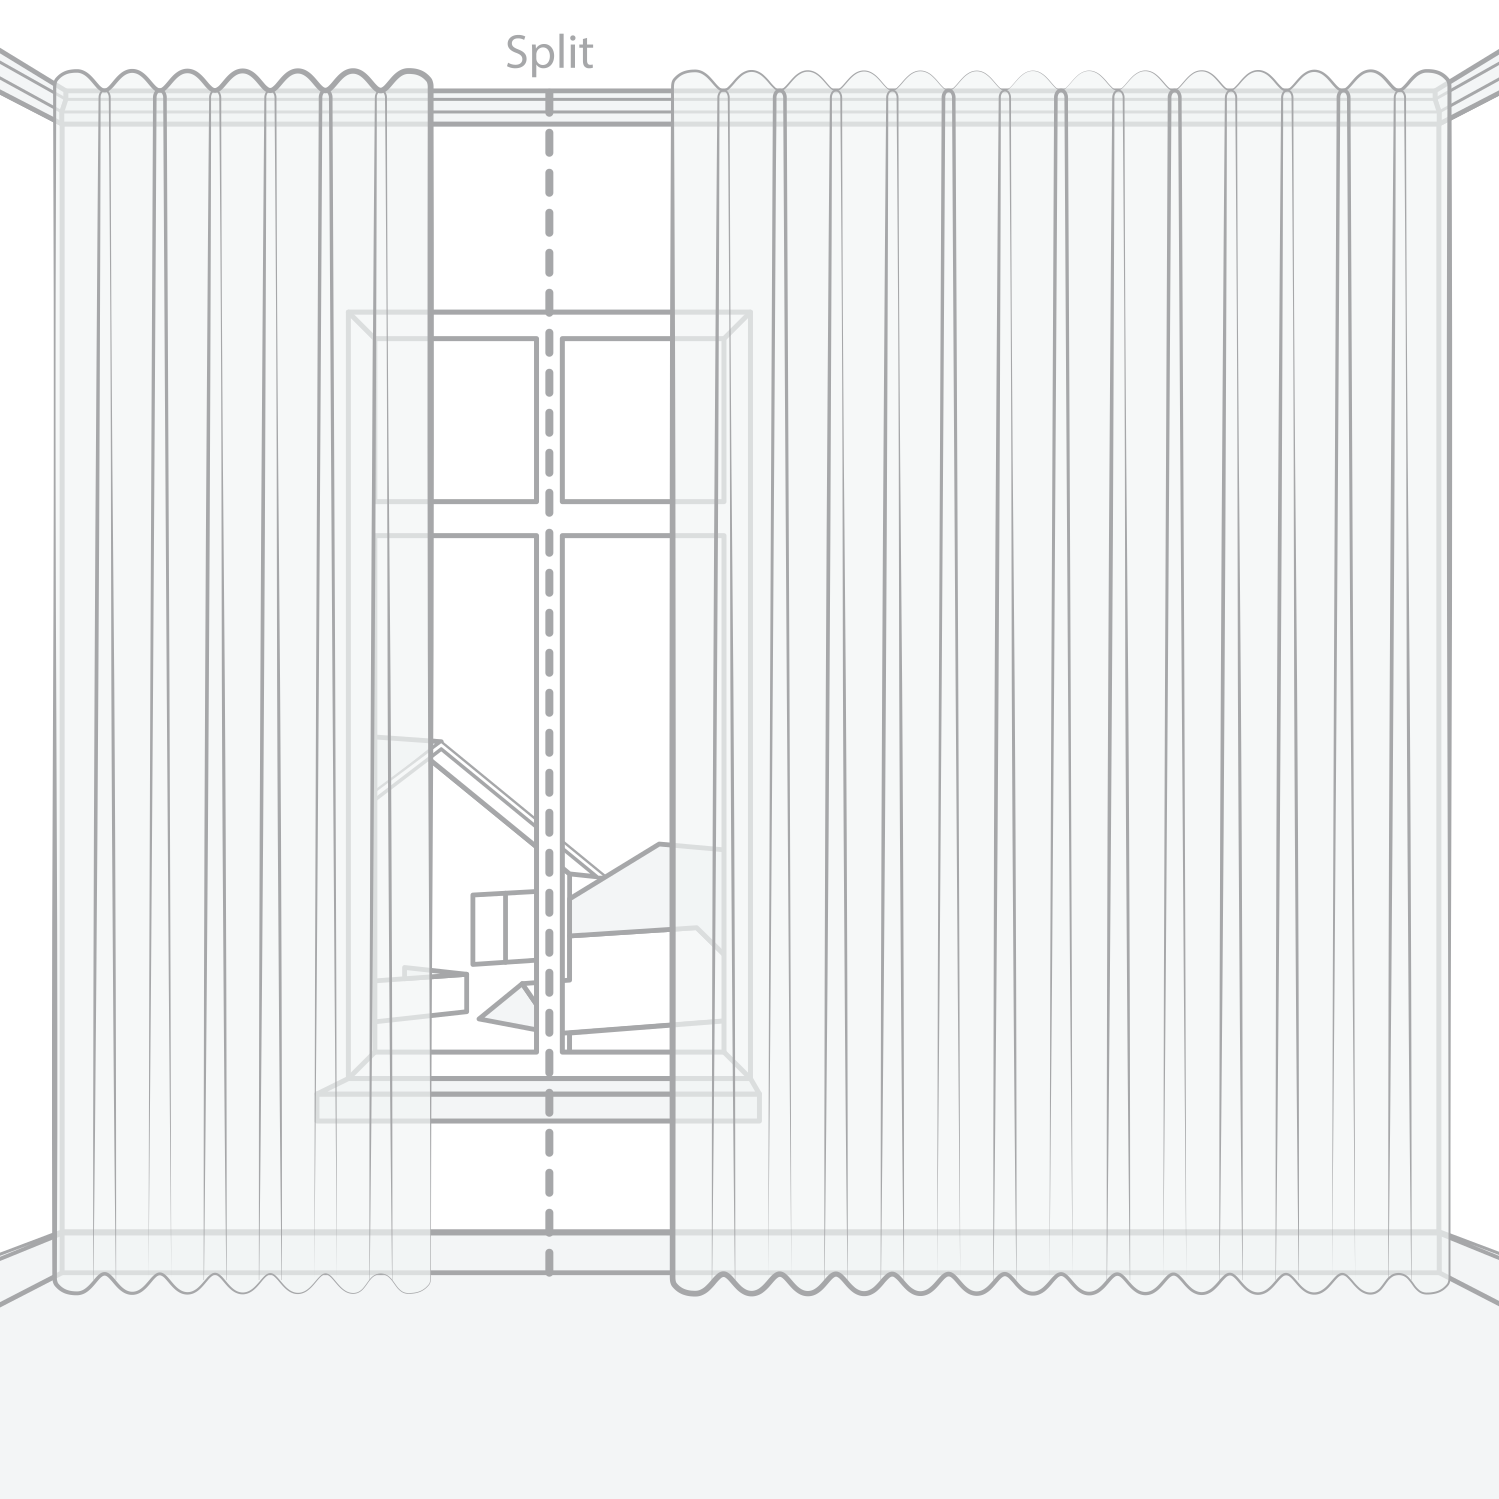
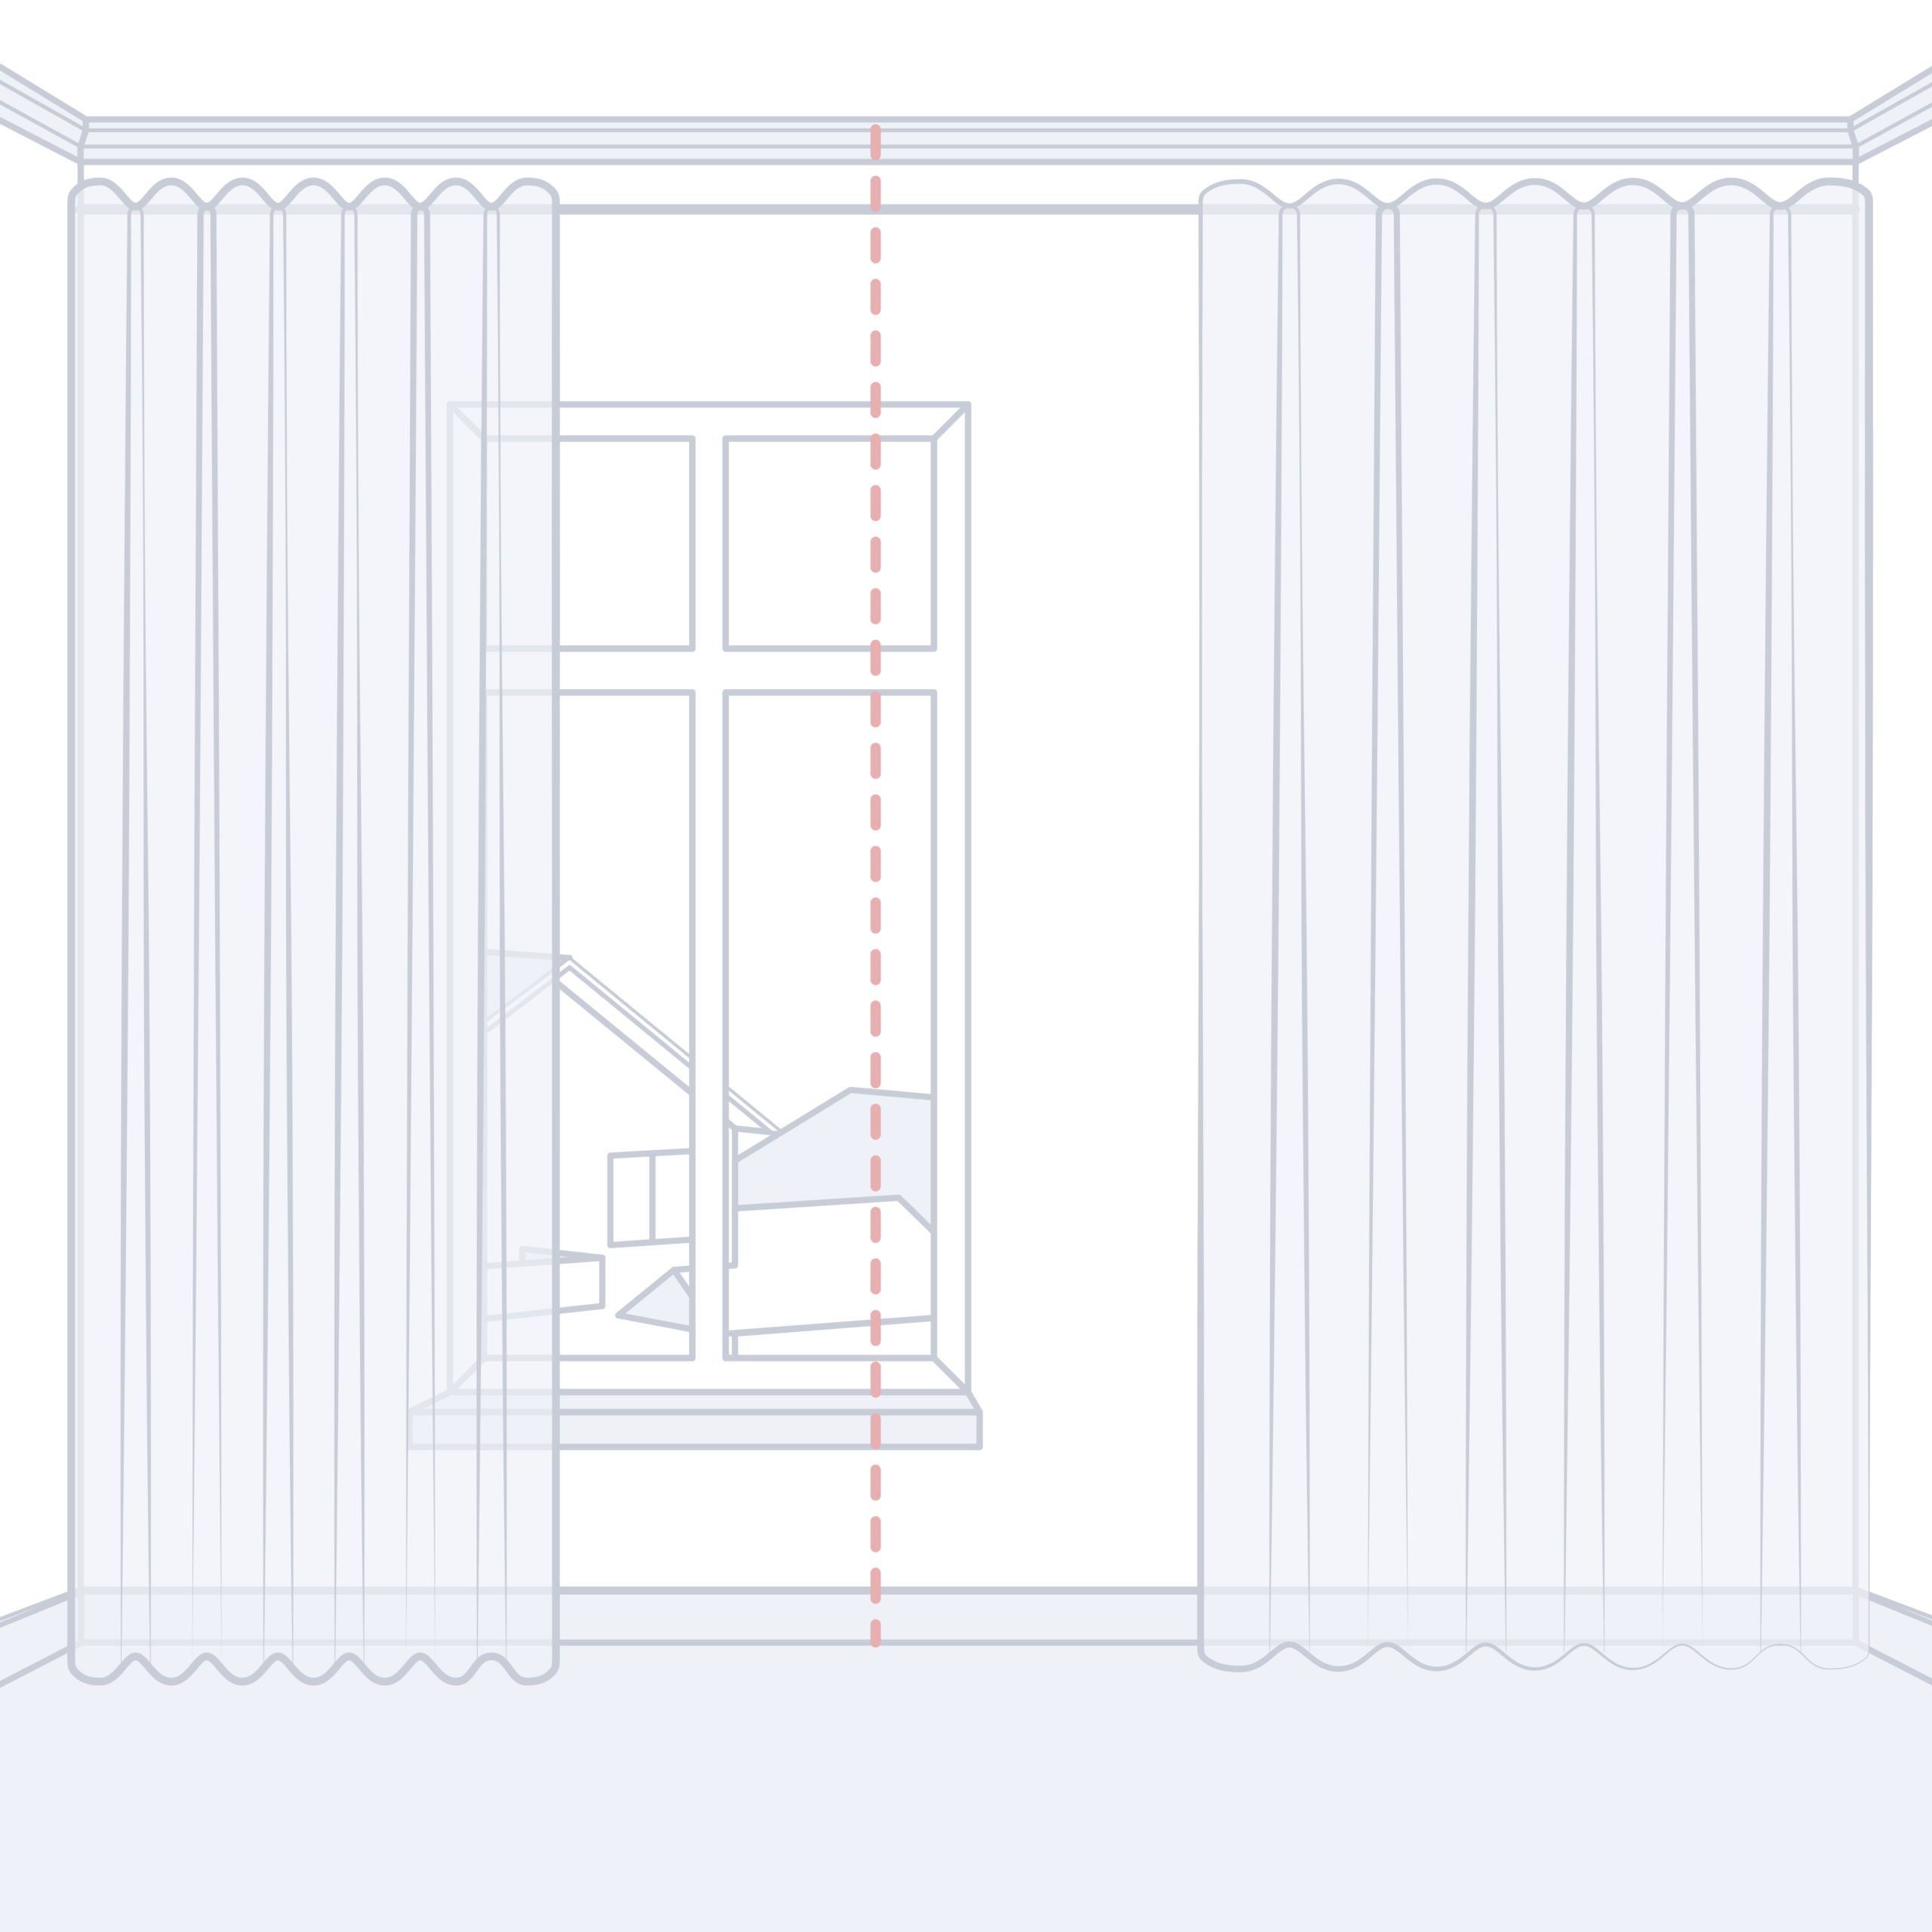
For multiple openings, you can select 1 or 2 splits and enter their precise positions. Curtain splits are ideal for uneven window positions, bi-fold and sliding doors, making it simpler to move sections of the curtain aside for access.

Select the number of splits you would like. If no split dimensions are entered, we’ll space them evenly across the track.

If you don’t want any splits, proceed to Step 3.

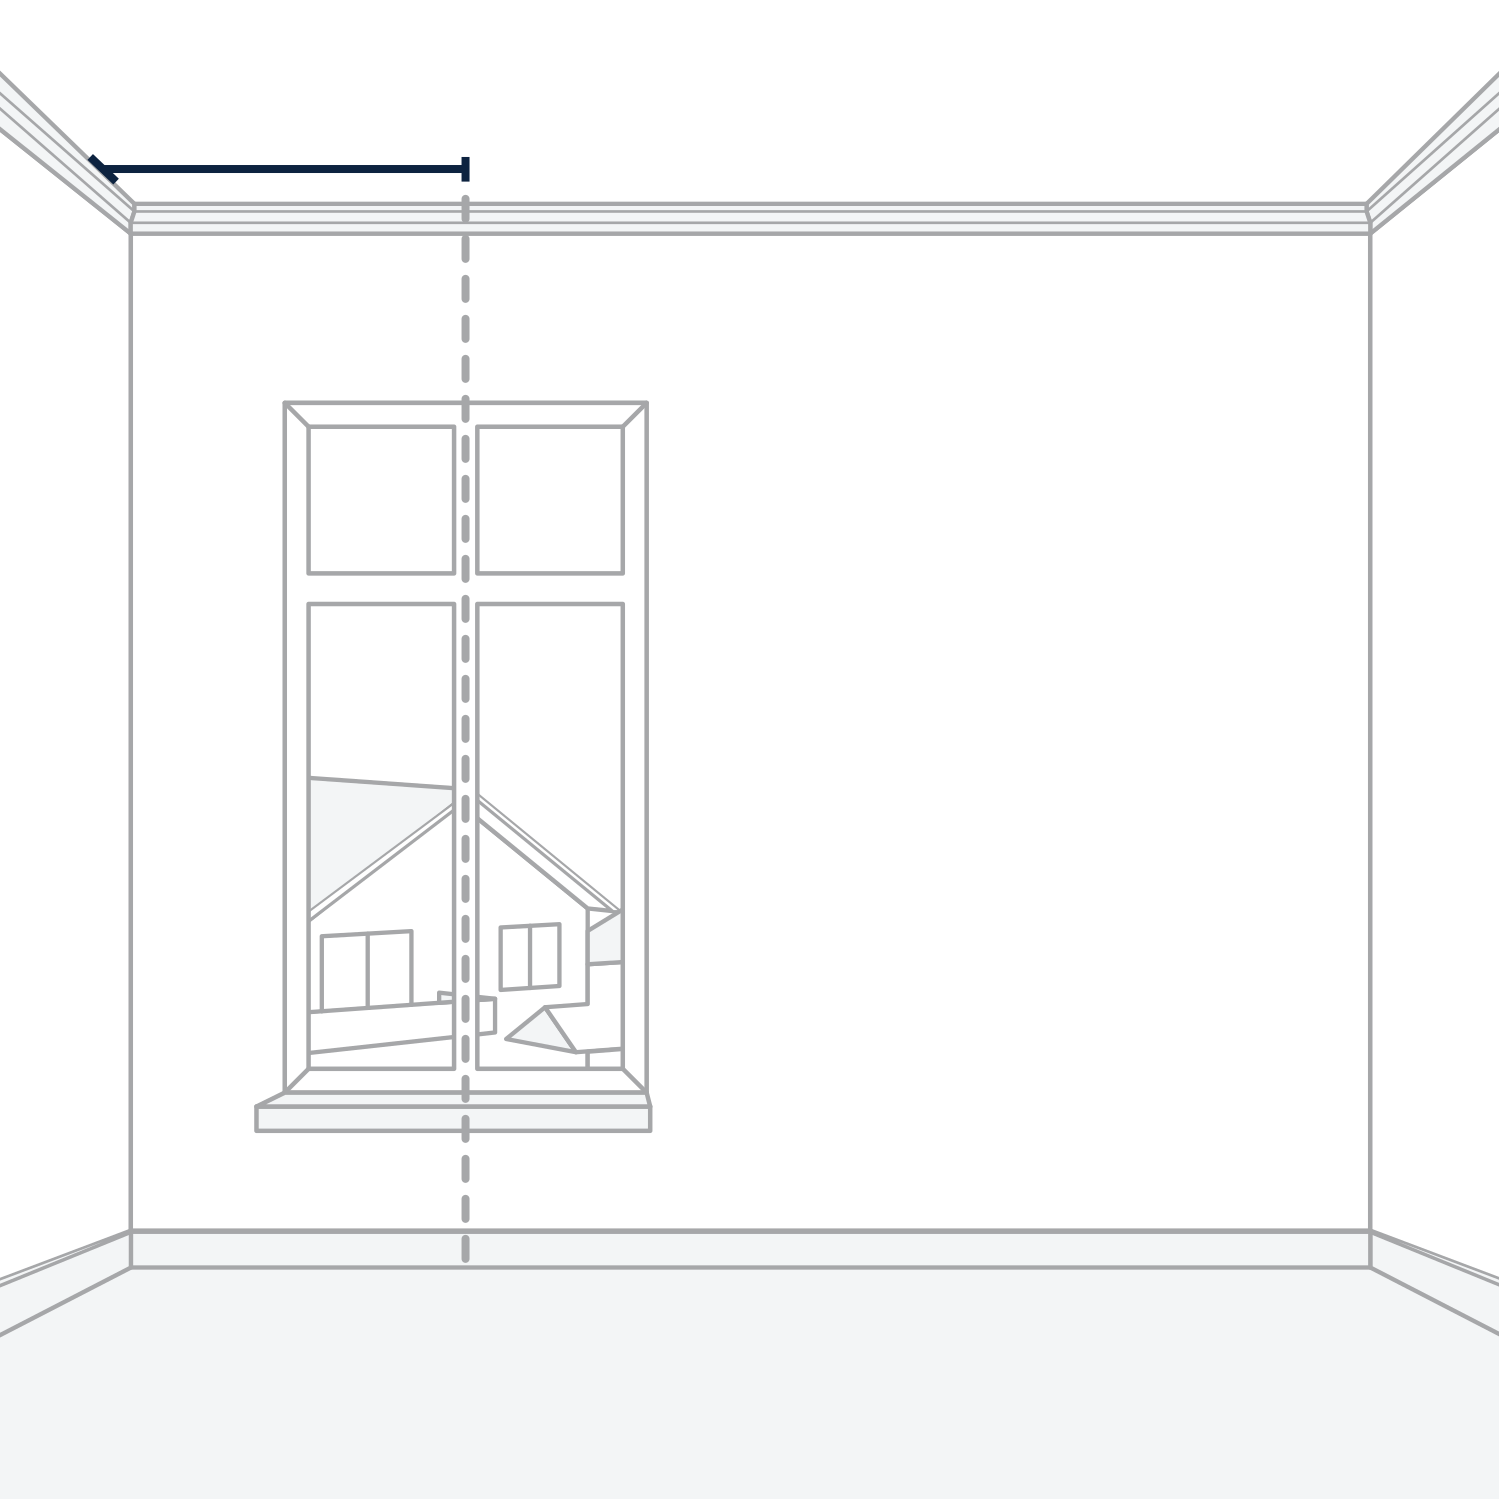
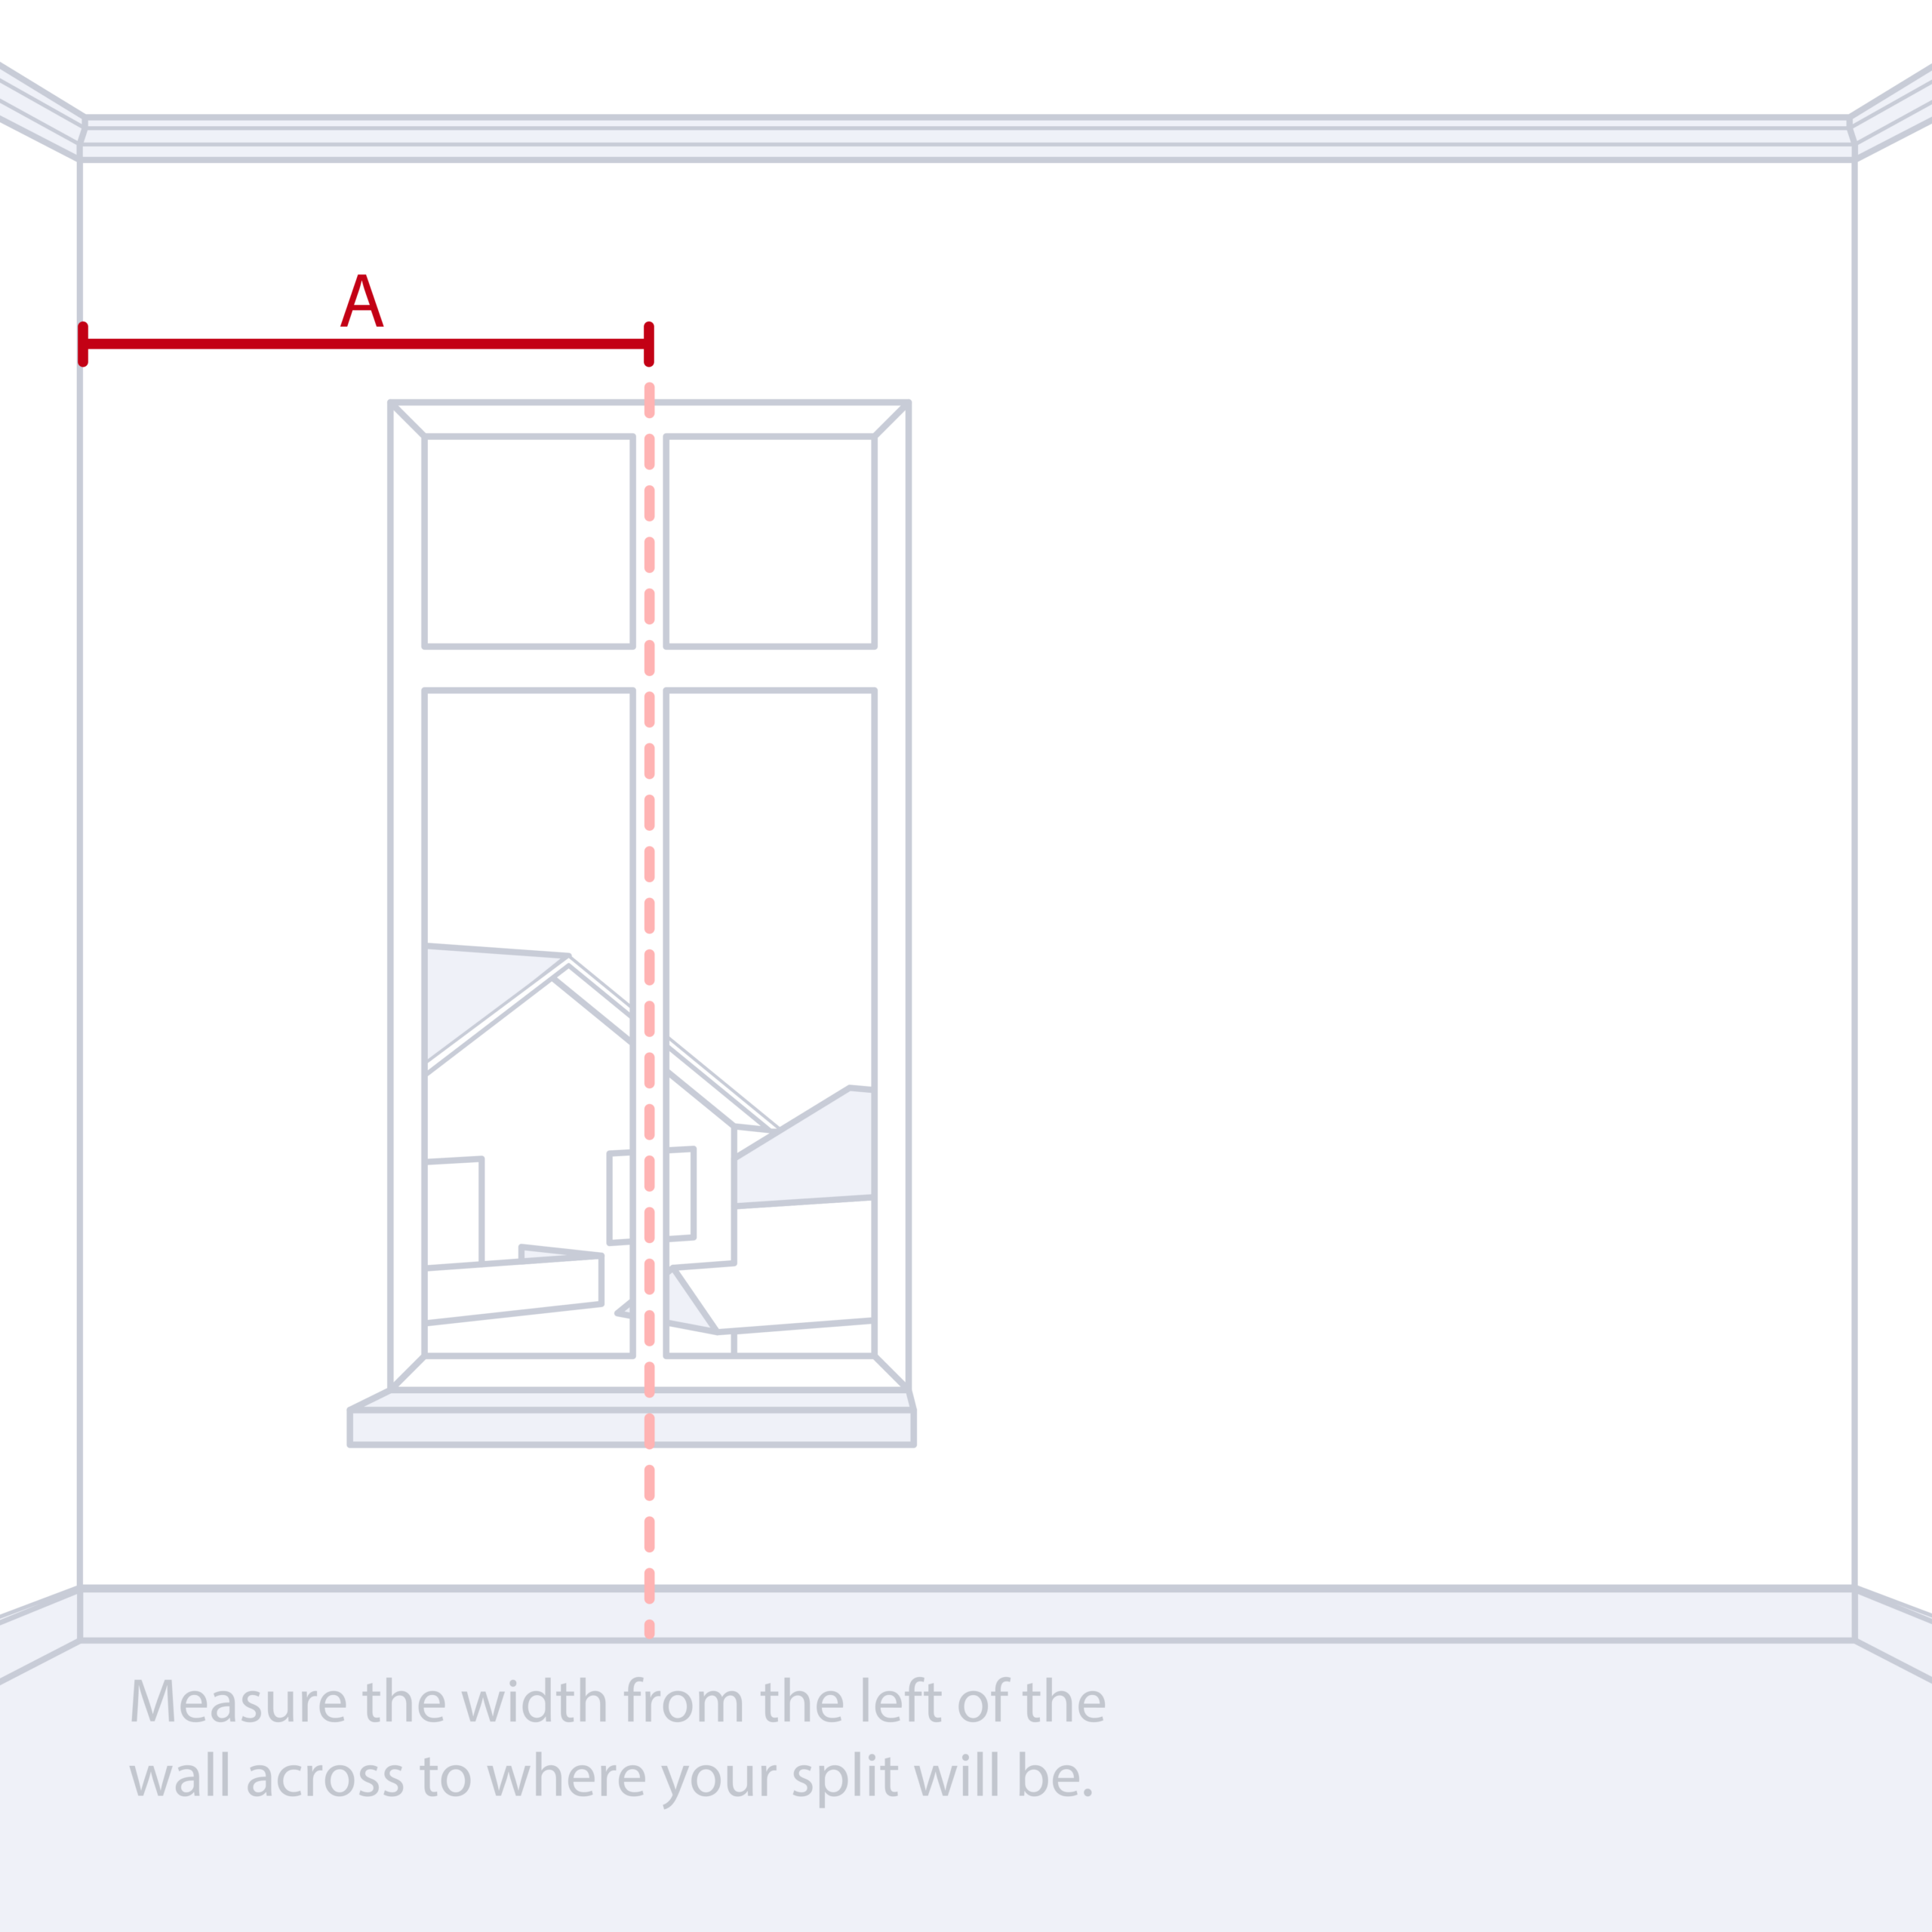
For one custom split, measure from the left side of the track to where you would like the split to sit, then record the dimension.

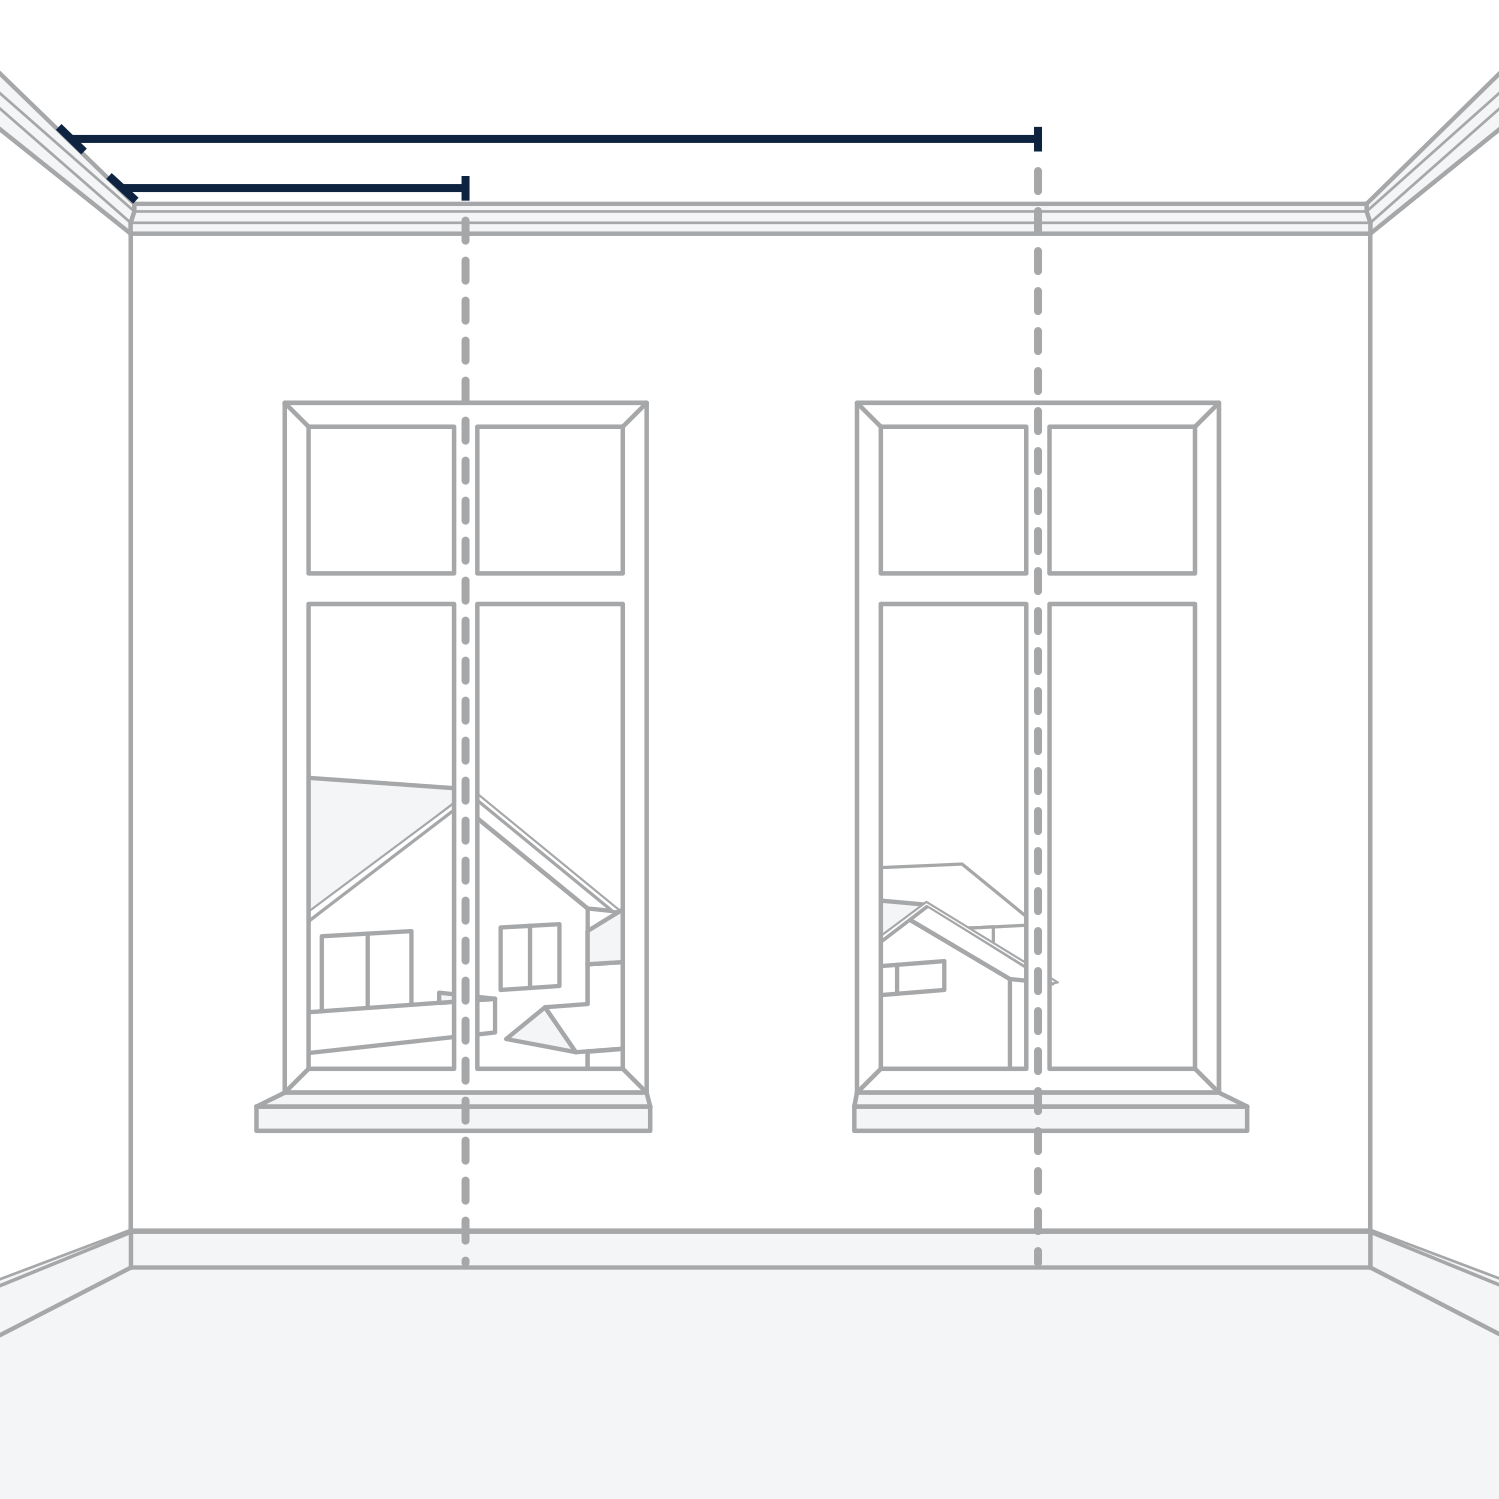
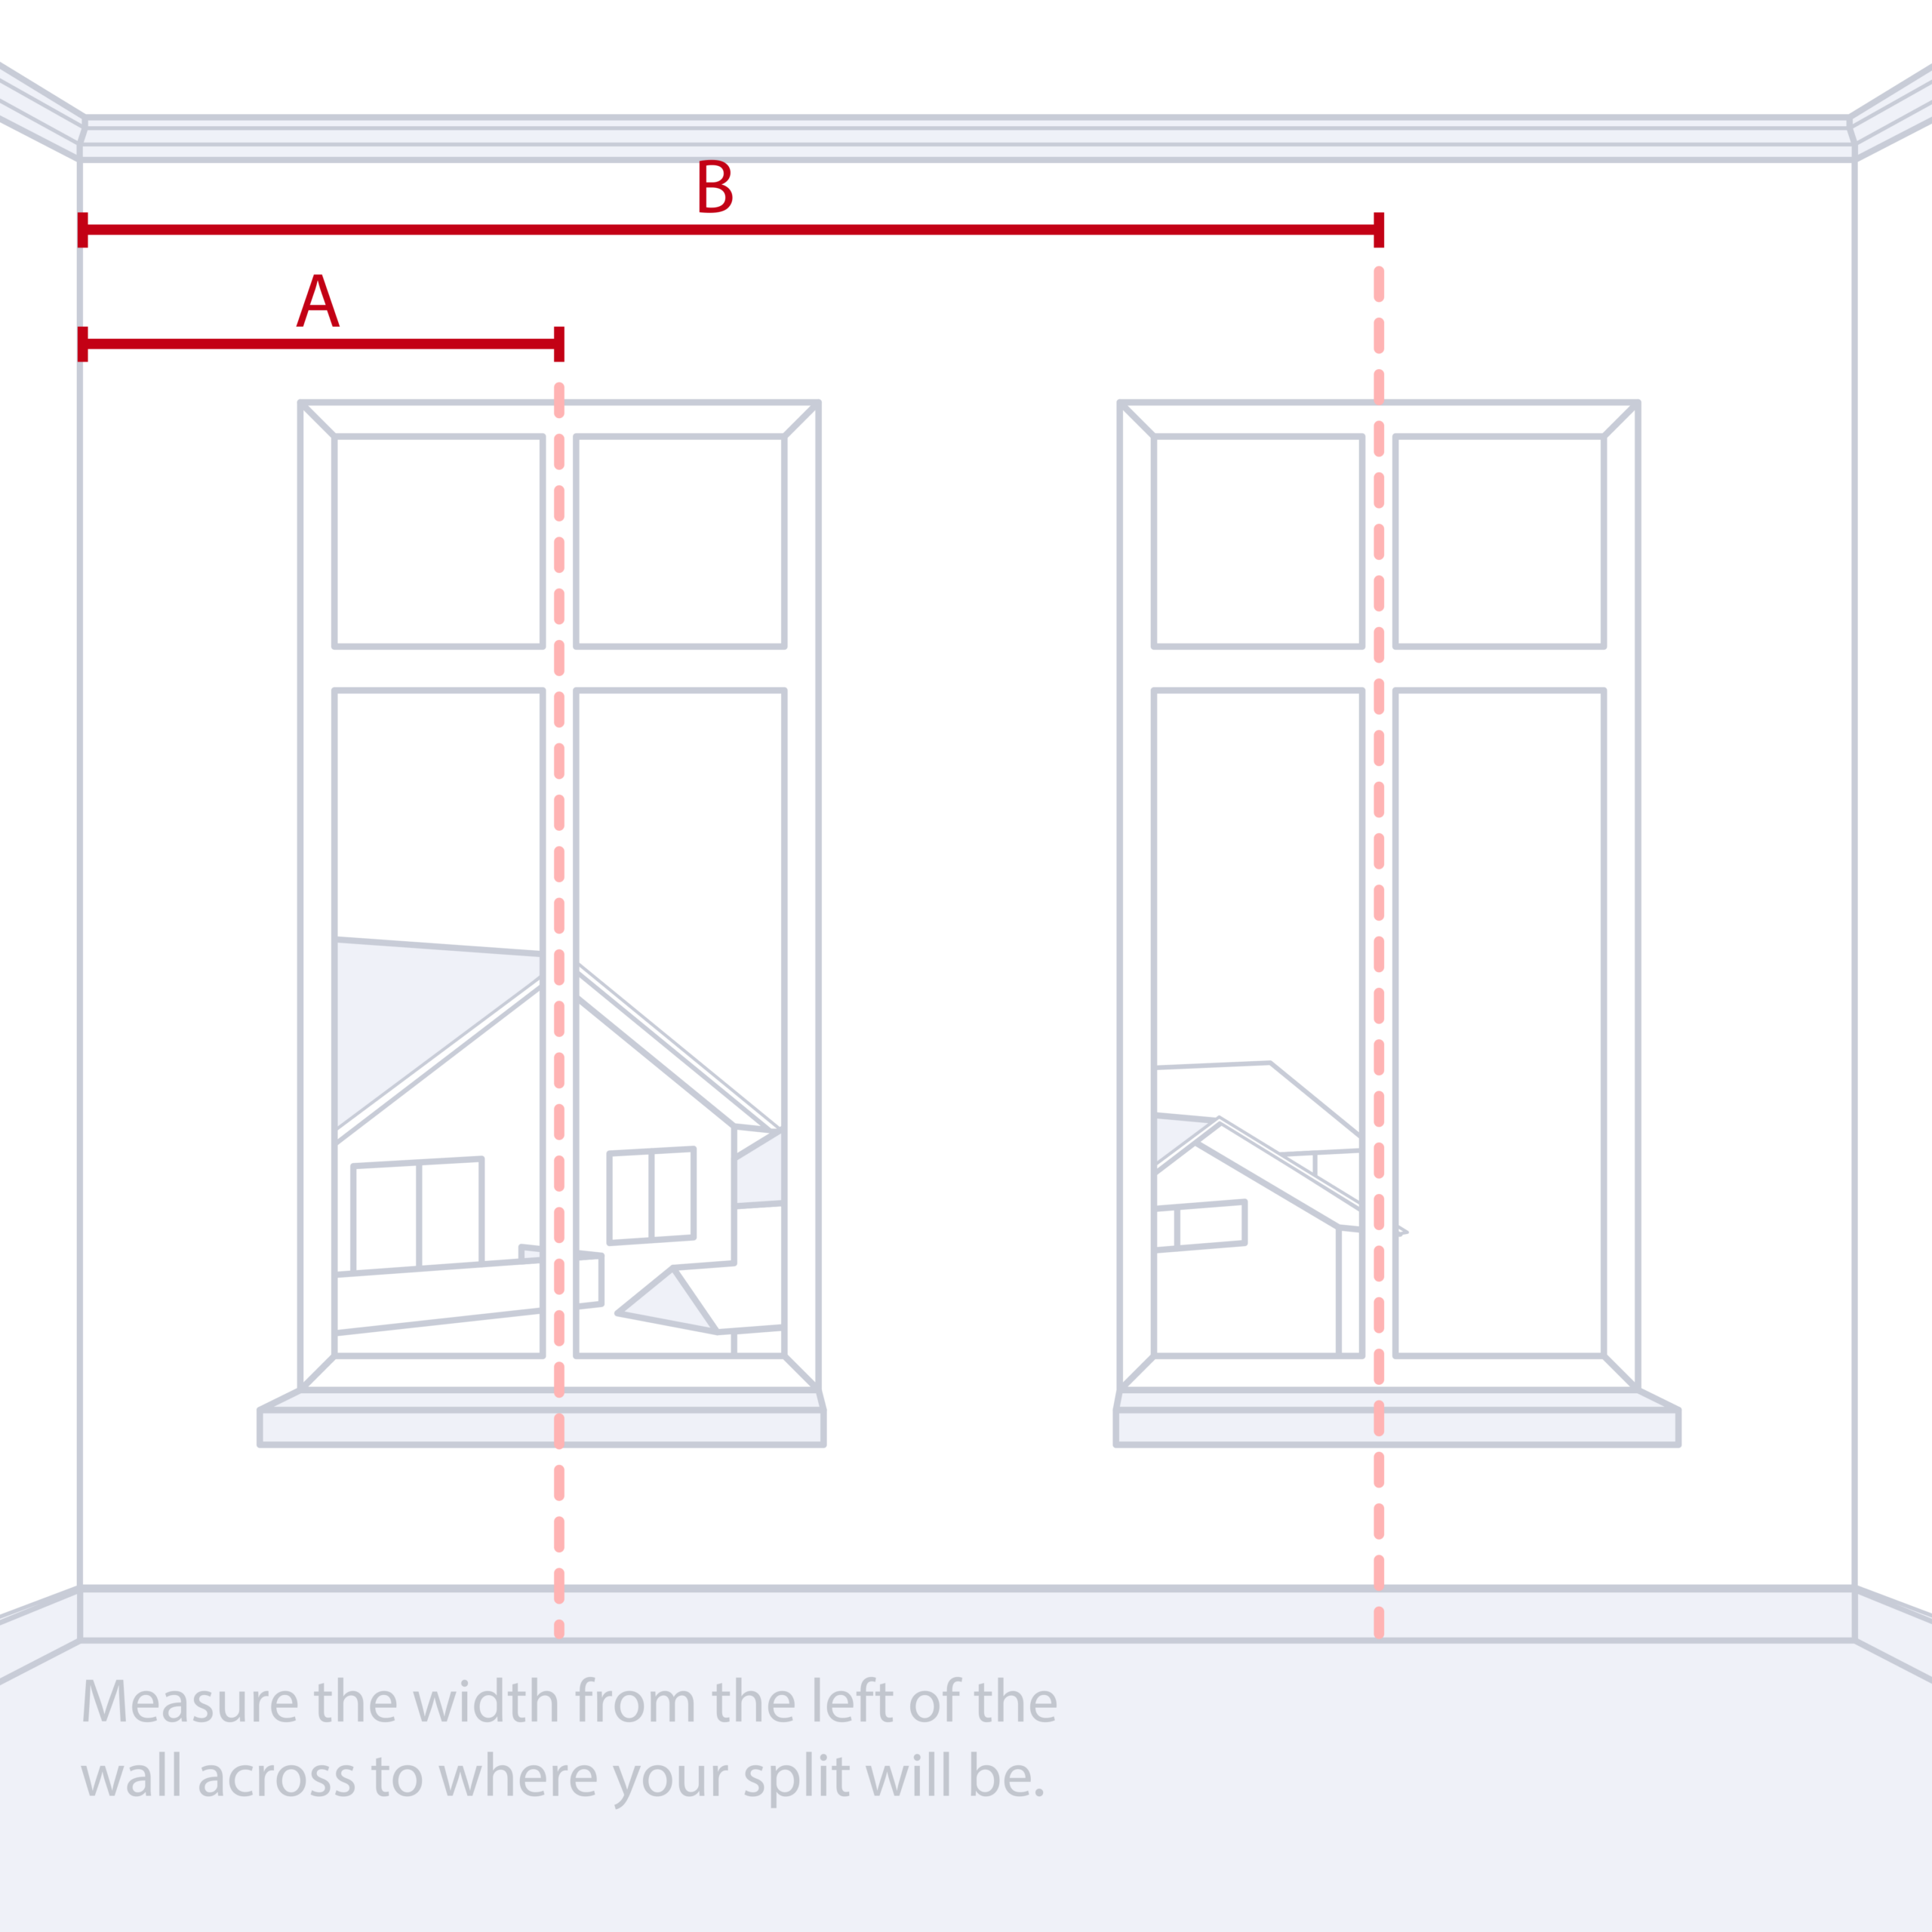
For two custom splits, measure from the left side of the track to each split position, then record both dimensions.

3

Find your drop dimension

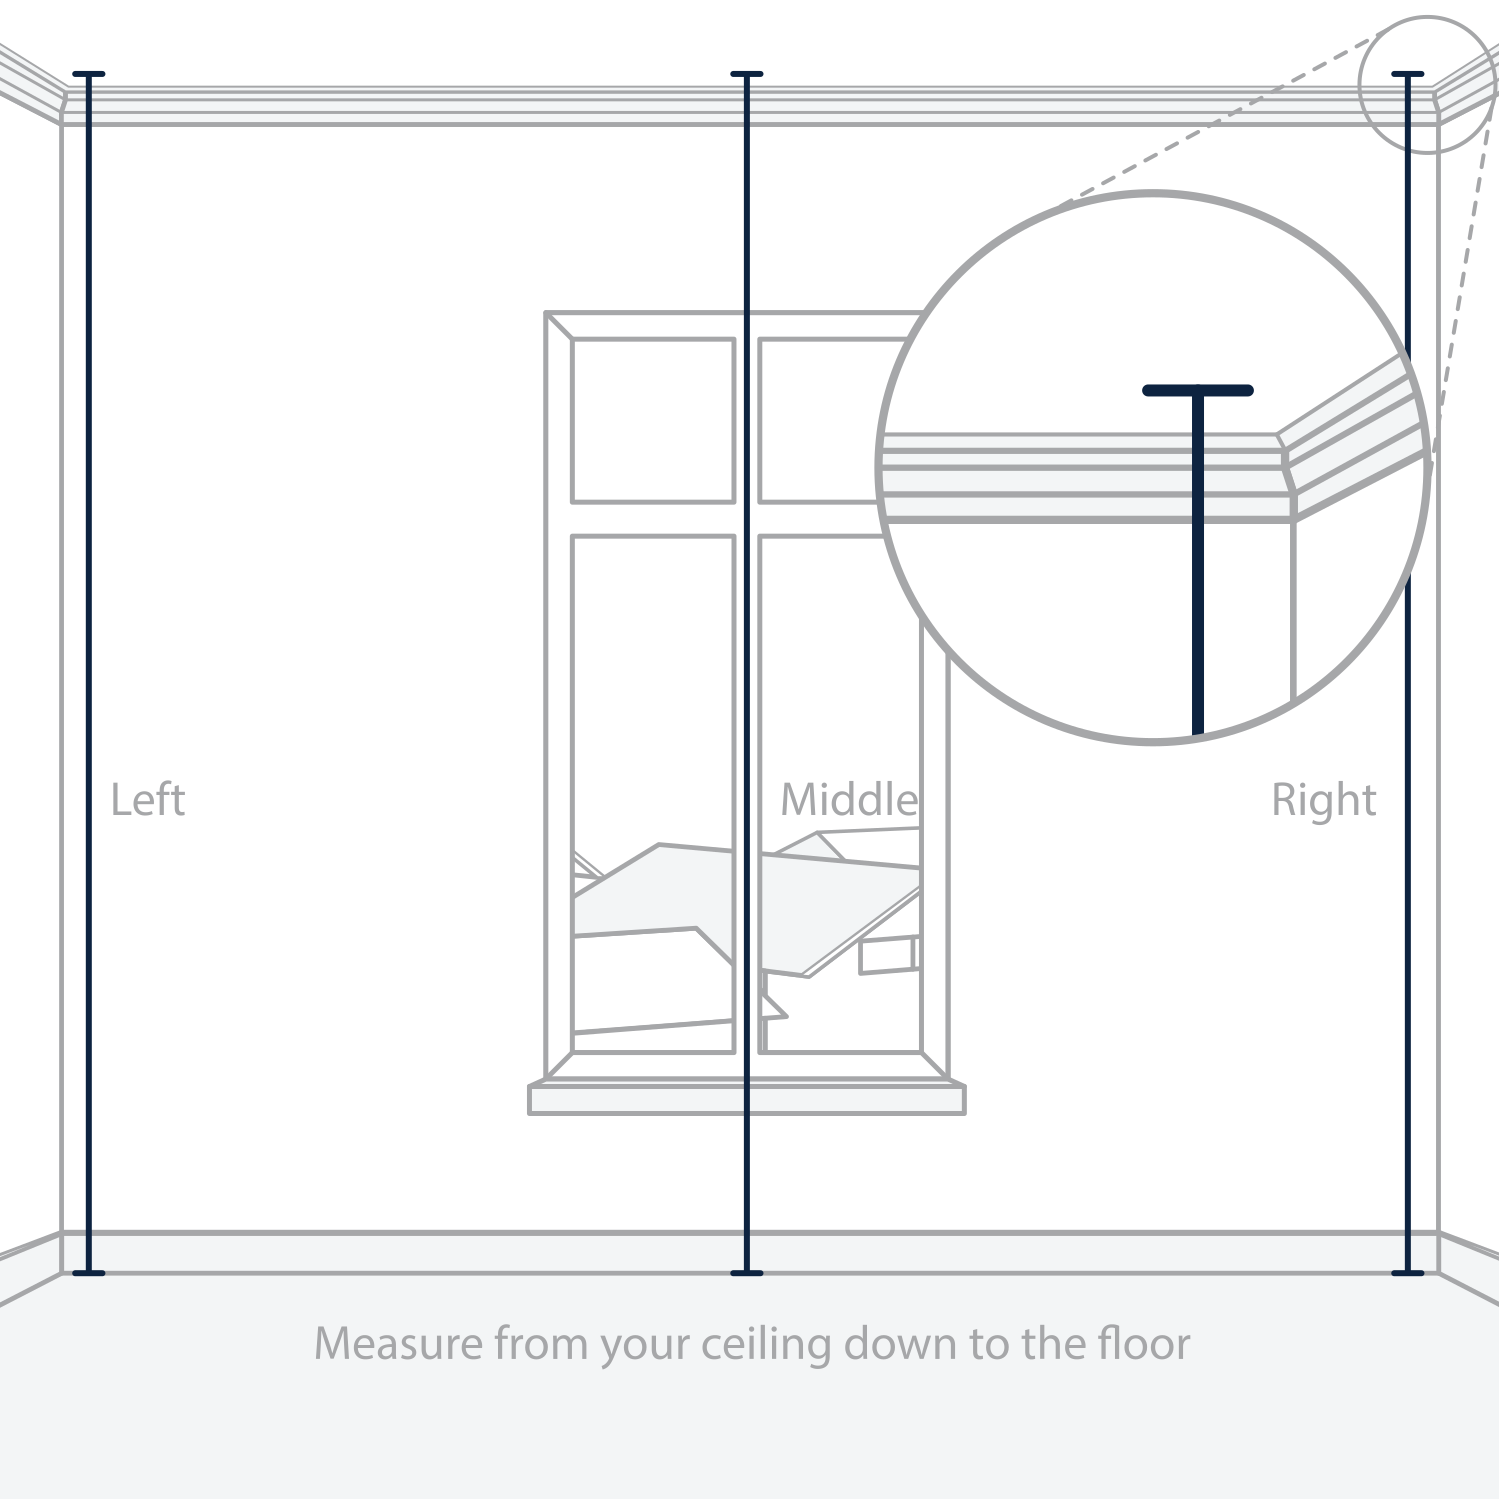
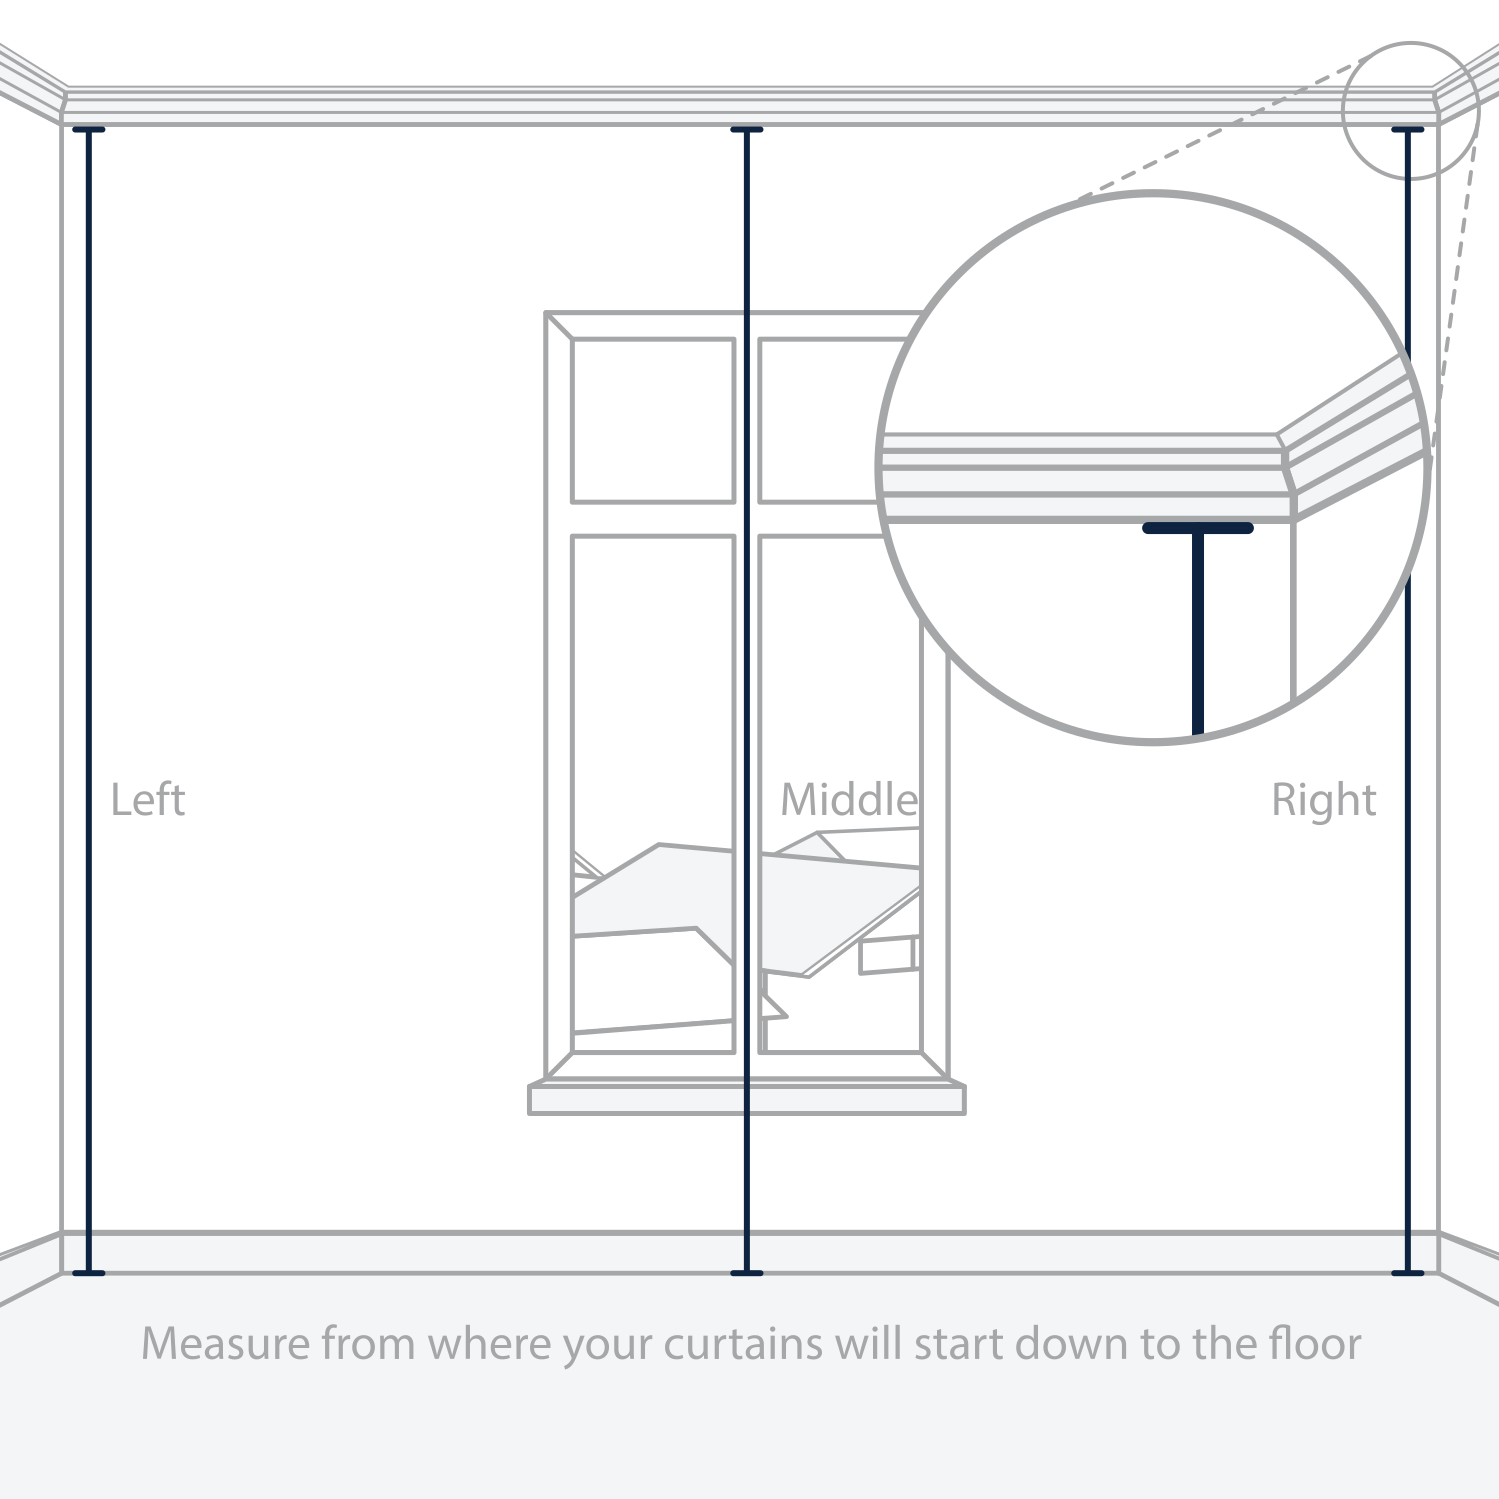
Measure from the ceiling down to the floor on the left, middle, and right side of the window opening. Where the opening has cornices, measure from the inside edge of the cornice.

Record the largest of the three dimensions. If the difference between your dimensions is more than 10 mm, our trade team recommends selecting a puddled finish.

4

Select your preferred finish.

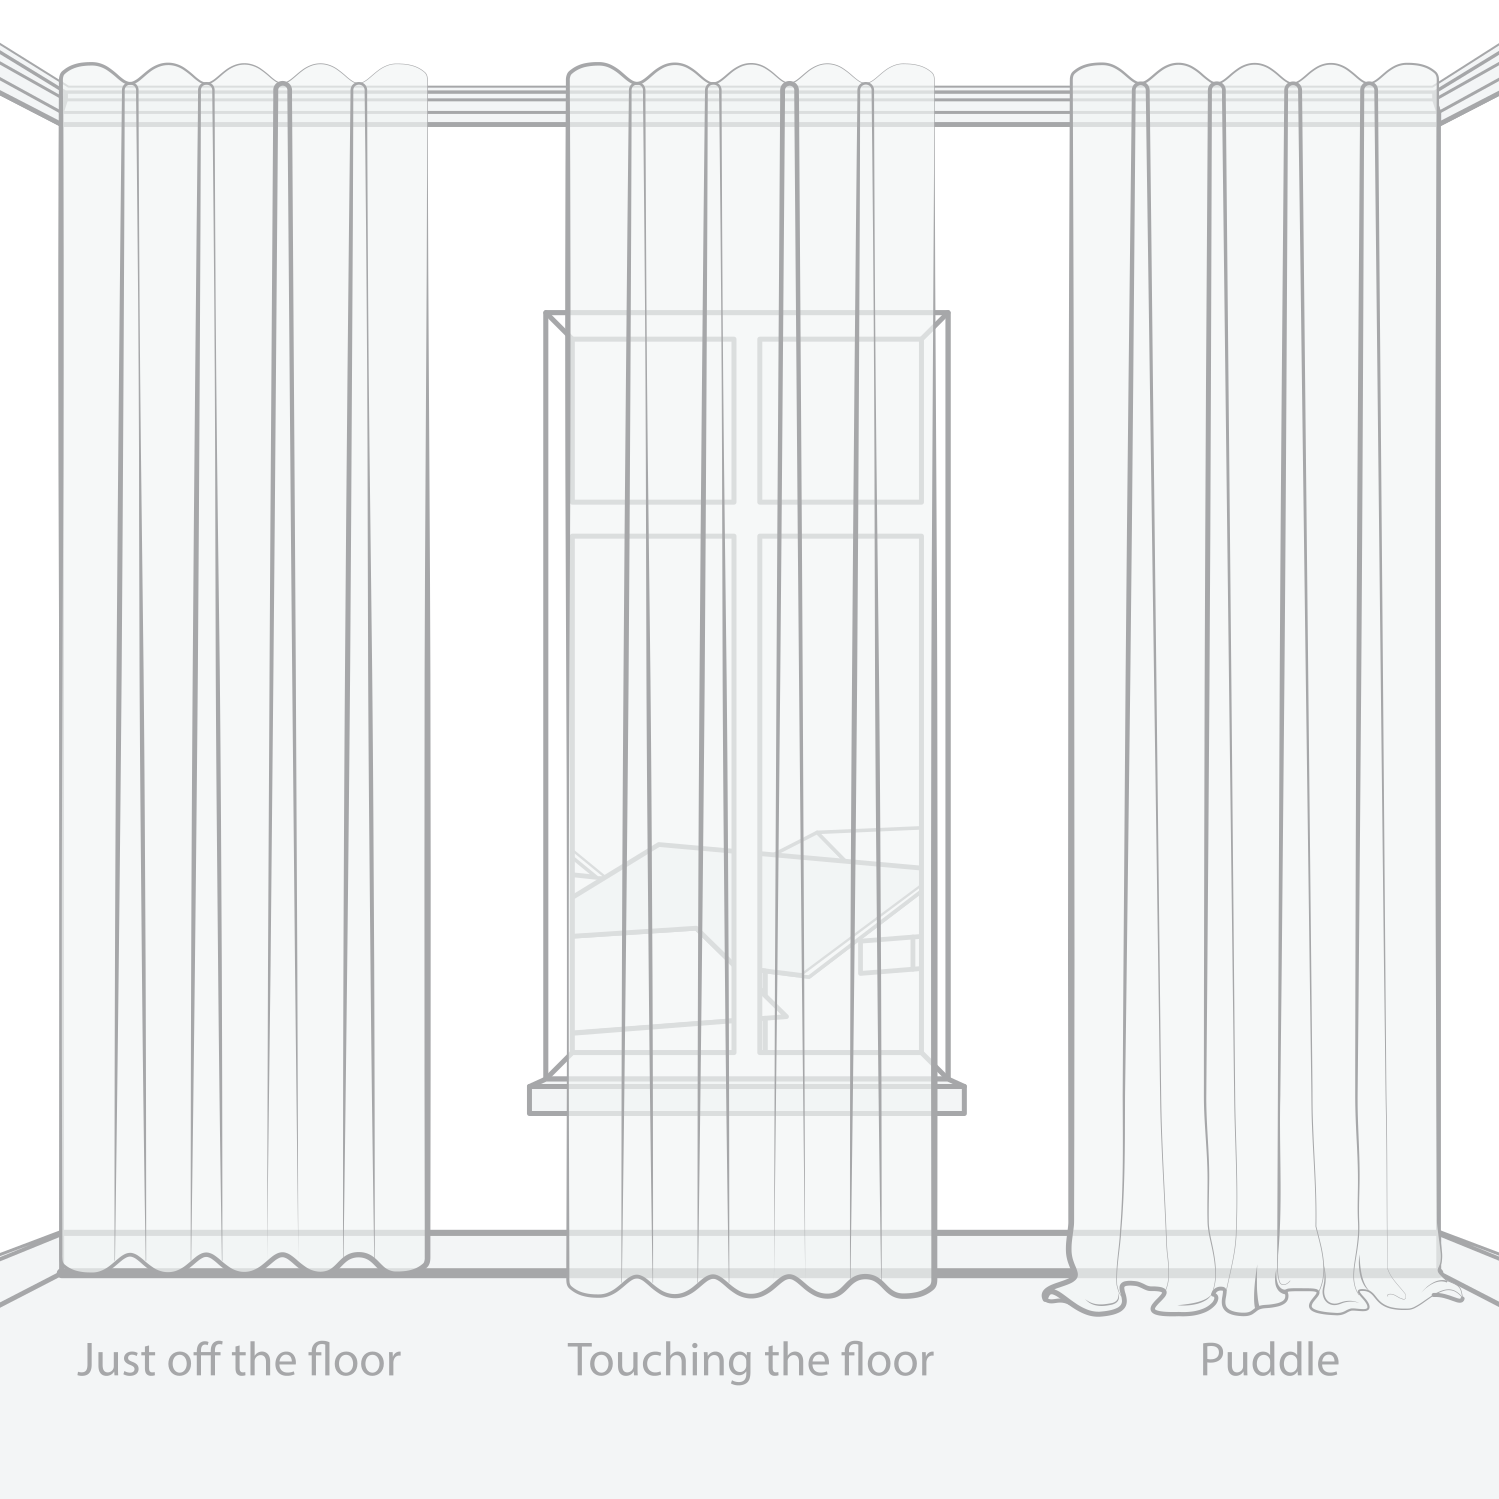
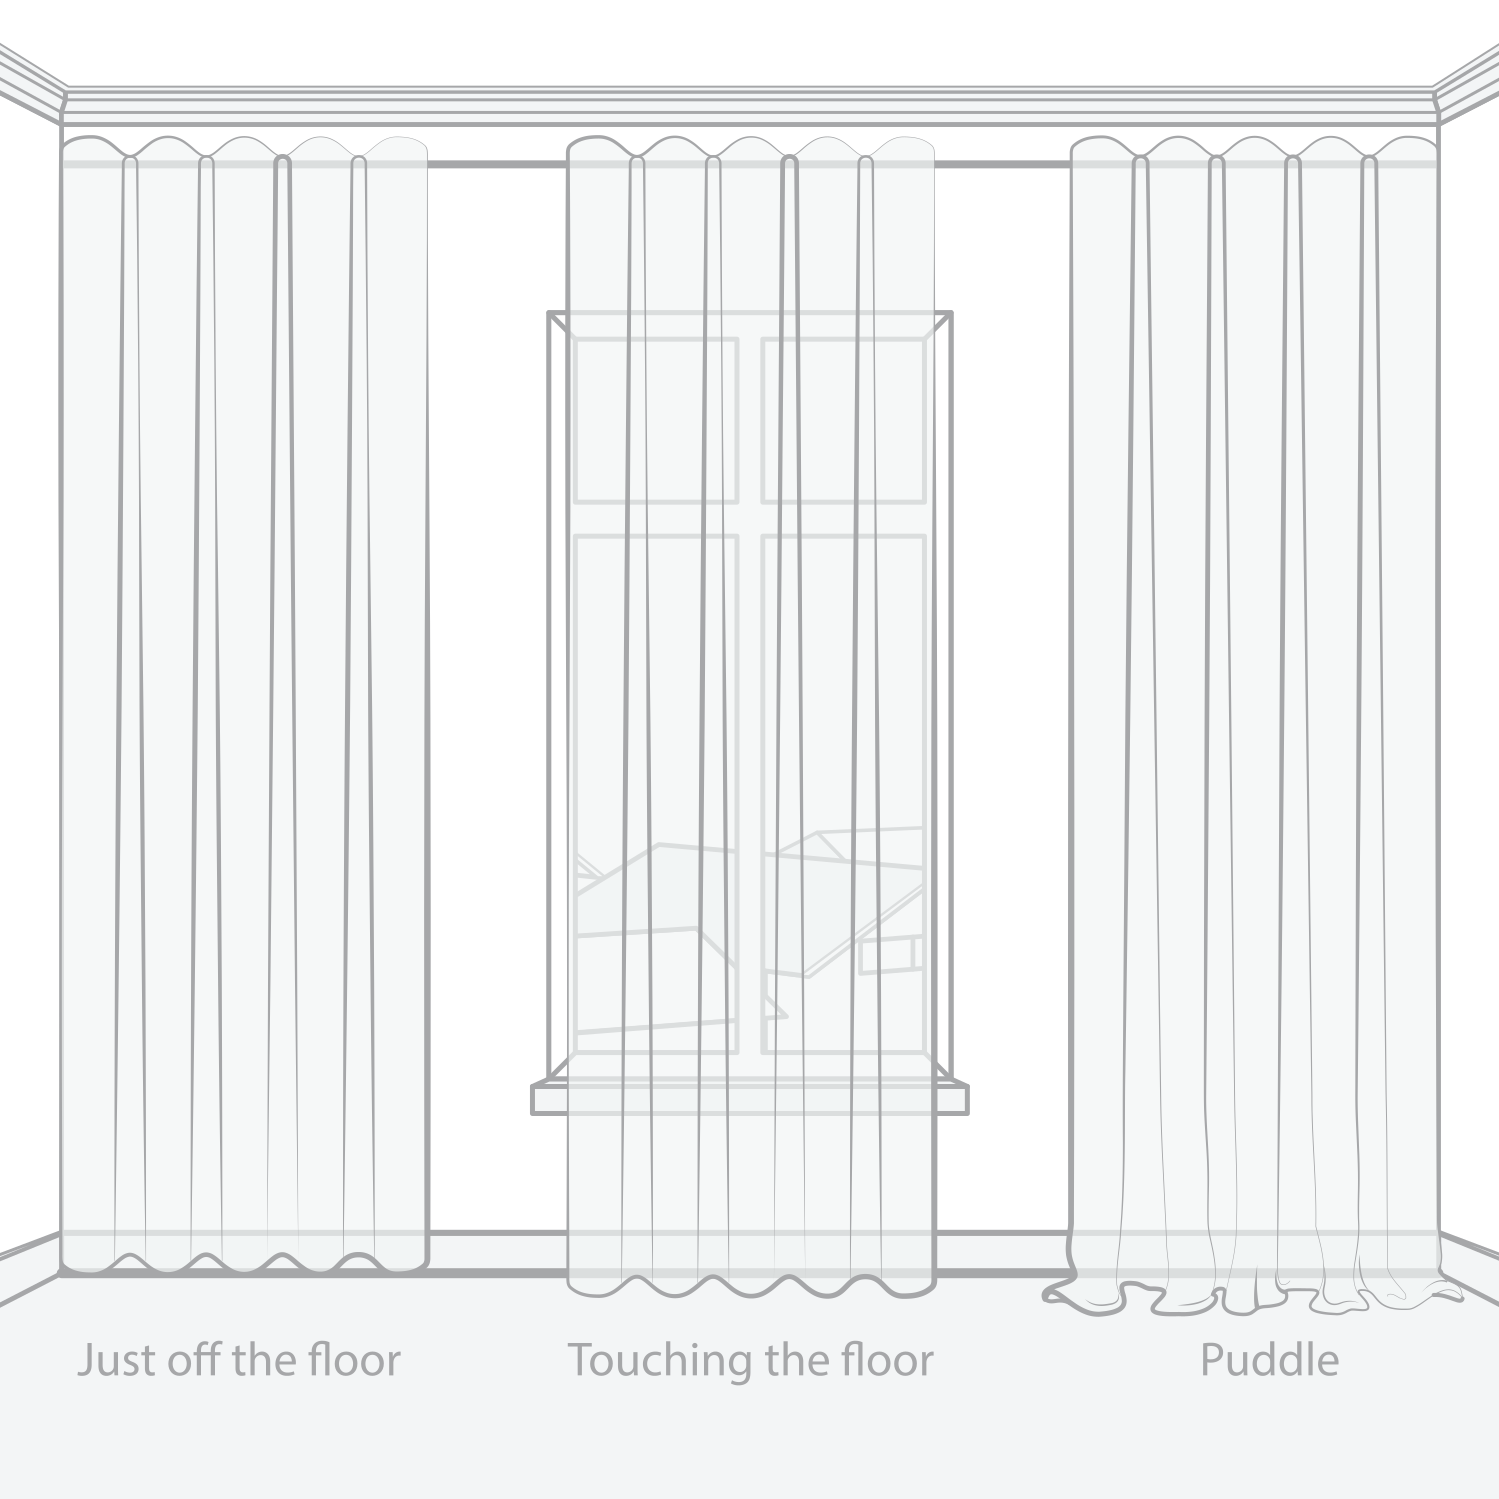
When designing and ordering your curtains, select from the three finish options below.

Enter your precise dimensions only. There’s no need to make any deductions or additions, as we’ll adjust your dimensions to achieve the right finish.

If you select Just Off the Floor, your curtains will be made approximately 5–10 mm shorter than your drop dimension, so they sit just above the floor.

If you select Touching the Floor, your curtains will gently skim the floor by up to 5 mm.

If you select Puddling, your curtains will puddle on the floor by approximately 20 mm. For a larger puddle, please leave a note in the comments section at checkout.

5

Select your stacking, and track flow.

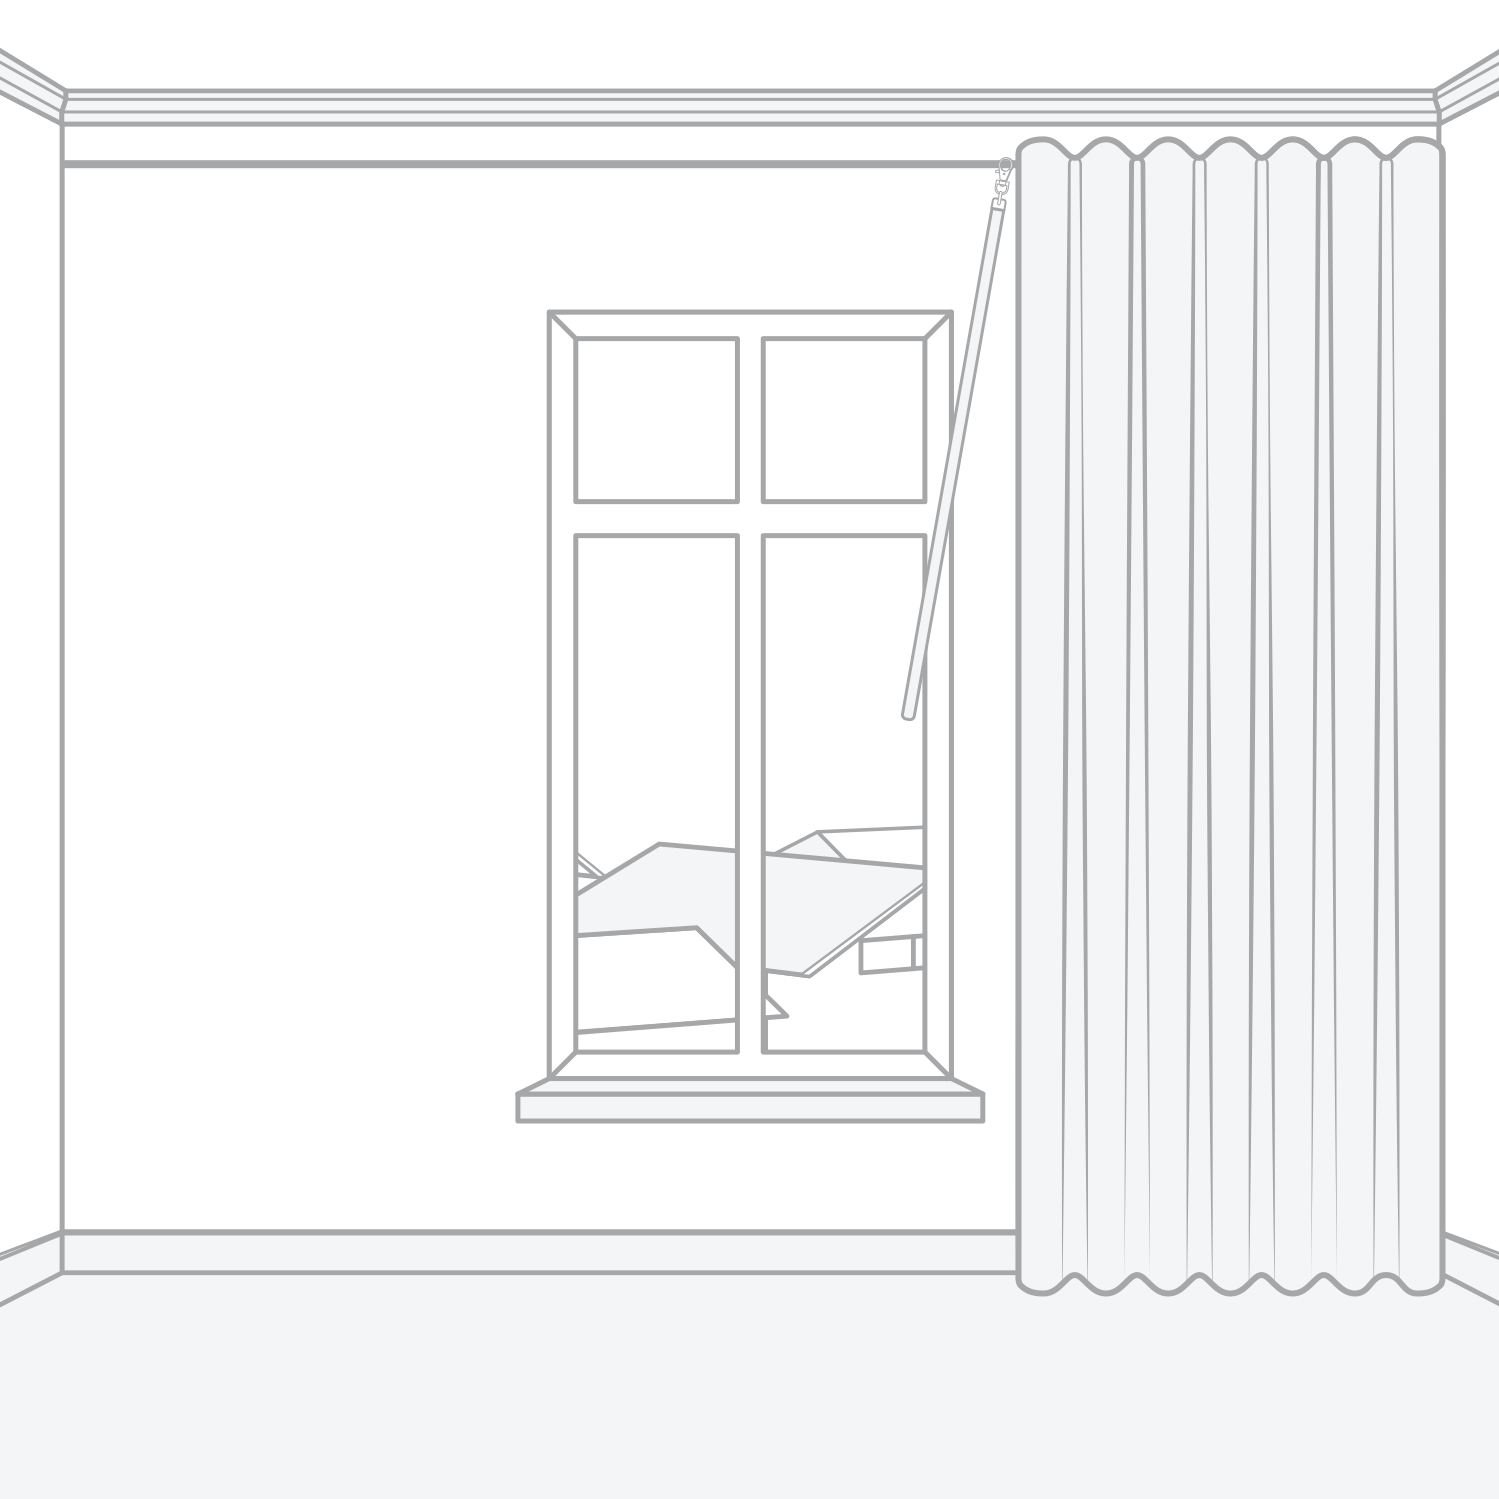
Select the wand size you need. As a guide, the longer your curtain drop, the longer your wand should be for straightforward reach and everyday use.

Next, select your preferred stacking style: left stack, right stack, centre opening, or multiple openings. Consider which side is easiest to access, whether there are any obstructions, and which part of the window or door you’ll use most often.

If you select motorisation with centre opening curtains, select the side you would like the motor located on. Motorisation isn’t available for curtains with multiple openings, but we’ll confirm your motor fits without you needing to adjust your dimensions.

Finally, select between a fixed flow track and a free flow track. A free flow track gives you complete flexibility to move and stack your curtains as you like. Please note that motorisation isn’t available with free flow tracks.

6

Complete Your Custom Curtain Order Online

It’s time to complete your custom curtain order online. During ordering, you’ll be able to select your preferred hem finish. There’s no need to add or deduct anything for the hem — we’ll take care of this for you.

Simply enter the precise dimensions you have taken in millimetres (mm), without adjusting them for your chosen finish.

If you select the wall-to-wall option on the product page, we will make a small deduction from your track width so the track fits neatly between your walls or cornices. For ceiling fit curtains, a wall-to-wall installation typically provides the best result.

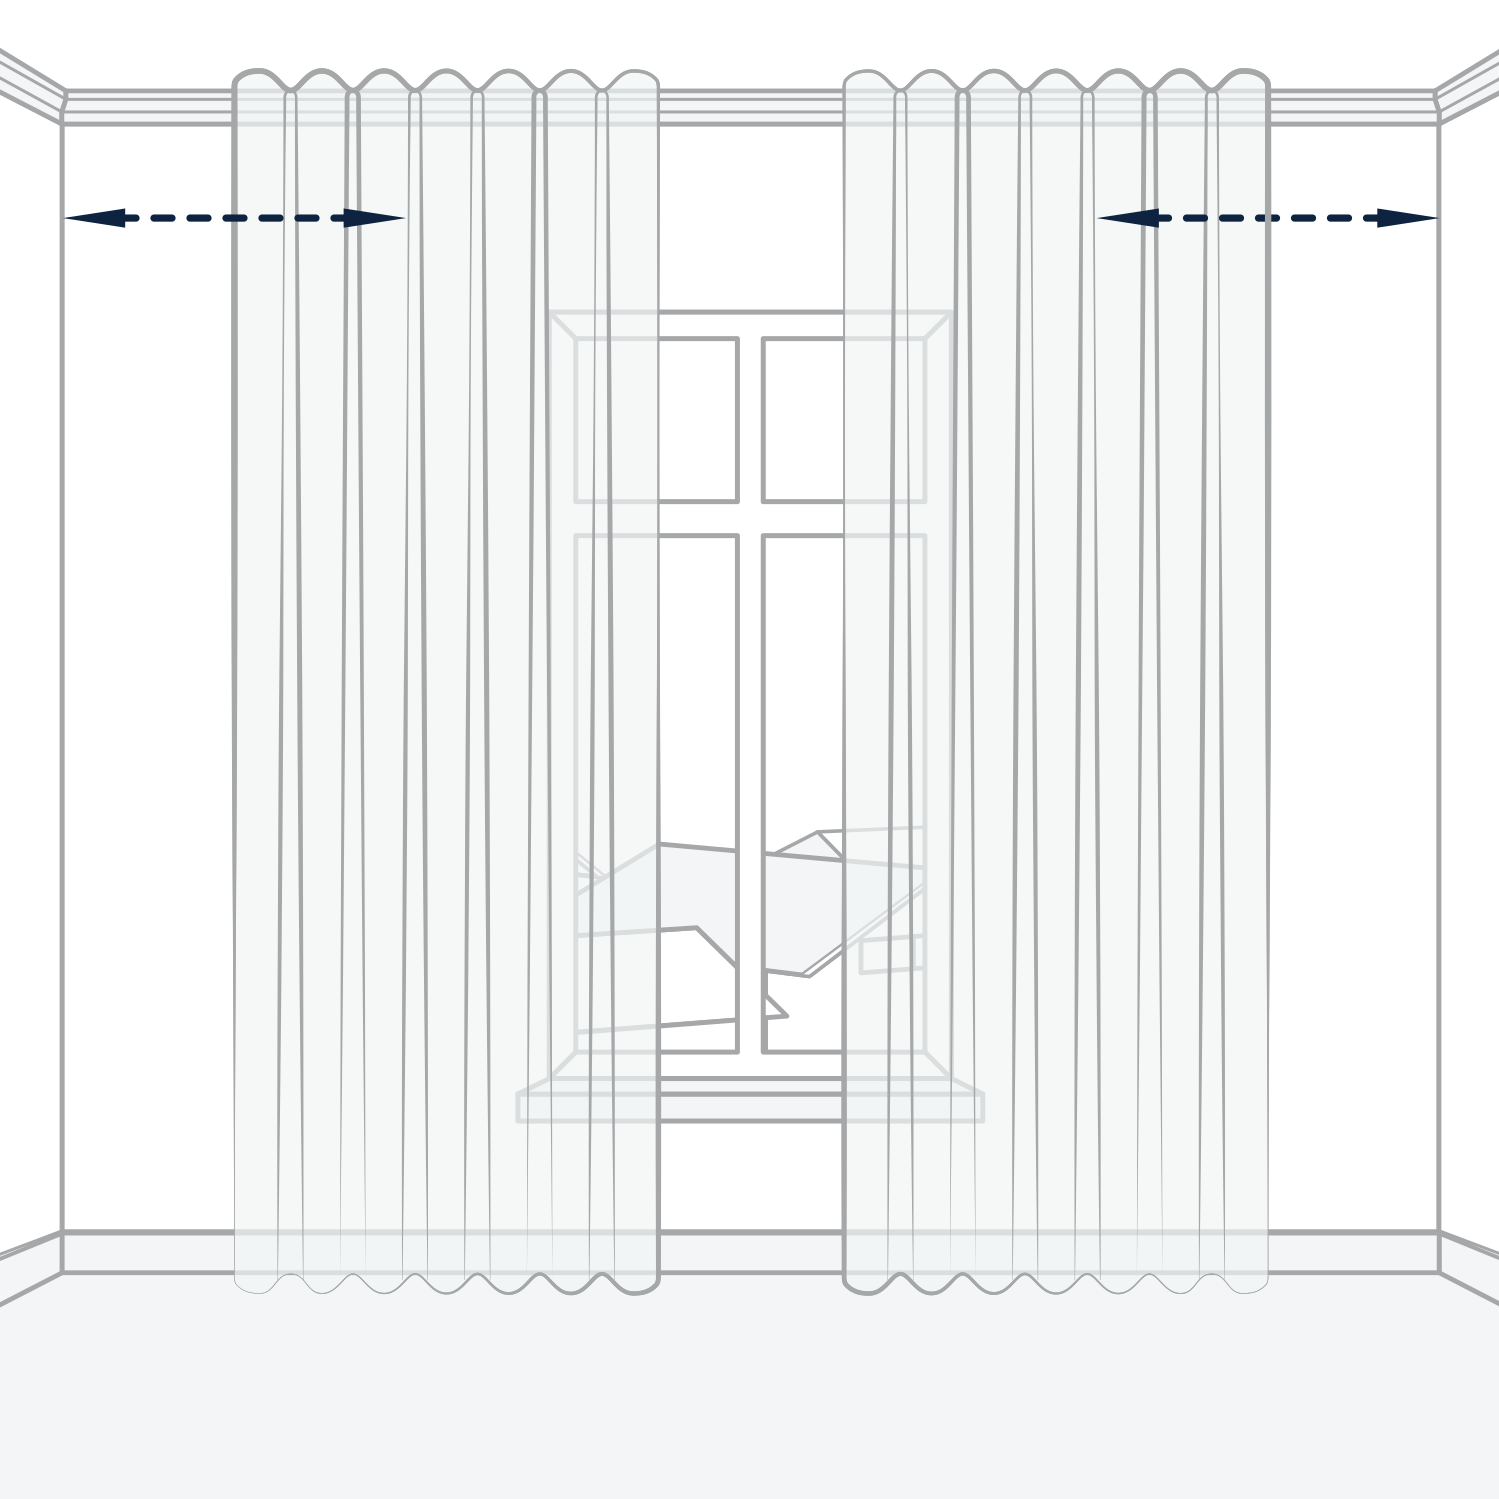
If you would like your curtains to frame the window opening, our trade team recommends a wall fit installation and adding at least 30% to the window opening width dimension. This can also work on a ceiling fit curtain. Confirm there are no obstructions on either side of the window according to your new track width.

While measuring this way, select standard fit on the product page, not wall to wall. Your track will then be made to your precise dimension so it frames the window opening beautifully. Please don’t make any deductions yourself.


Wall fit Curtains

Alright, it’s time to start measuring. We’ll guide you through it step by step.

1

Find Your Width Dimension

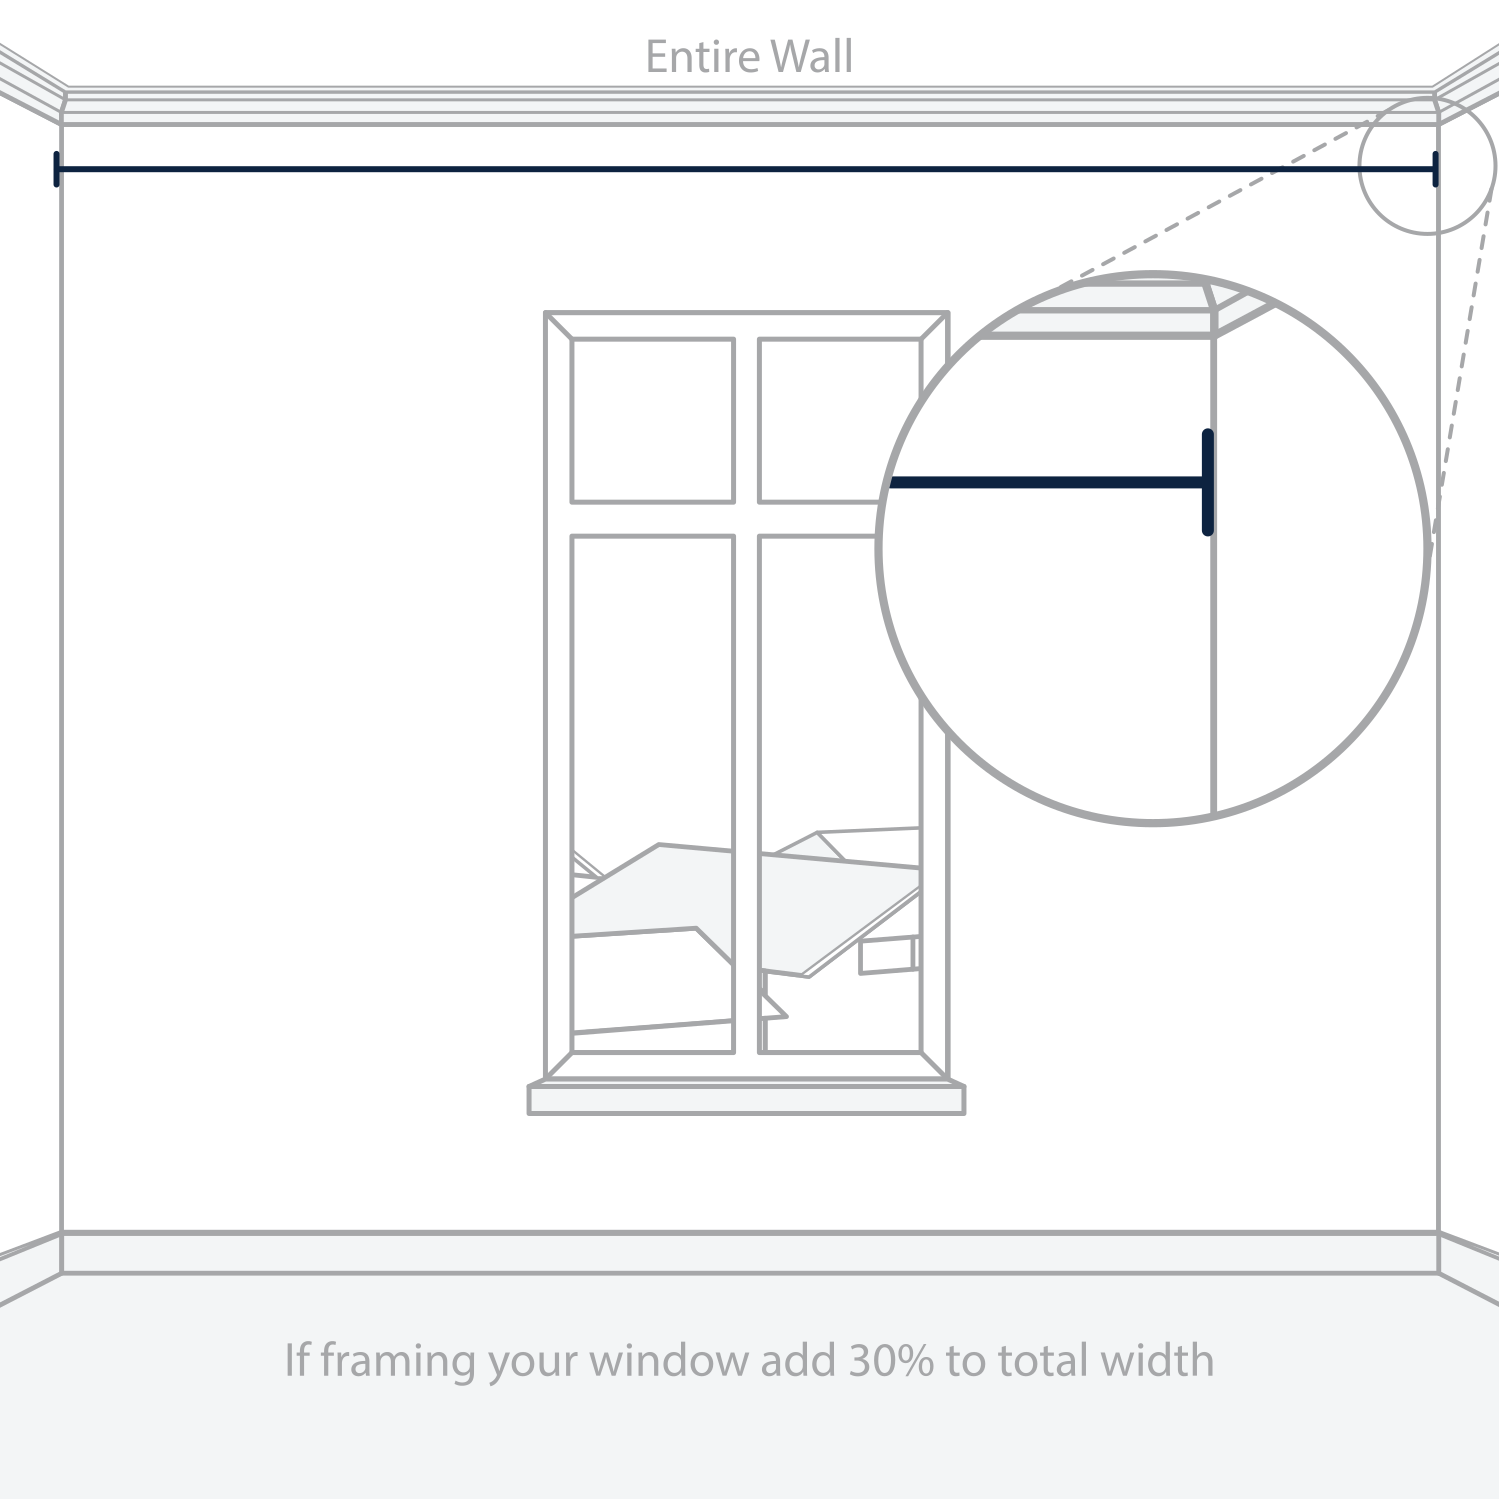
For curtains covering the entire wall:
Measure the full width from one wall to the other and record this dimension as your track width.

For curtains framing the window opening:
Measure the width of the window frame or recess across the top, then add approximately 30% to allow the curtains to stack neatly beyond each side of the window.

As an example, if the window opening measures 2000 mm wide, adding 30%—or 600 mm—will give you a track width of 2600 mm.

After you have calculated your track width, confirm that there are no walls, doors, light switches or other obstructions inside the extended area.

There is no need to calculate the amount of fabric needed. We will determine this for you according to the track width provided.

2

Select Your Split Points (Optional)

For multiple openings, you can select one or two splits and specify exactly where you would like them located. Splits are especially useful for bi-fold and sliding doors, allowing sections of the curtain to move independently for simpler access.

Select the number of splits needed and provide their dimensions. If no split positions are nominated, we will space them evenly across the track.

If you don’t require any splits, proceed to Step 3.

For one custom split, measure from the left end of the track to your preferred split position and record this dimension.

If you are “framing” the window opening, confirm to take into account where your track will start after adjusting for stack back when determining the split position.

For two custom splits, measure from the left end of the track to each preferred split position and record both dimensions.

While measuring from the outer left edge of the window frame or recess, add the needed left-side stack allowance to each applicable dimension. This allows the curtains to stack clear of the window glass. Record the adjusted totals as your split positions.

3a

Mark the starting dimension

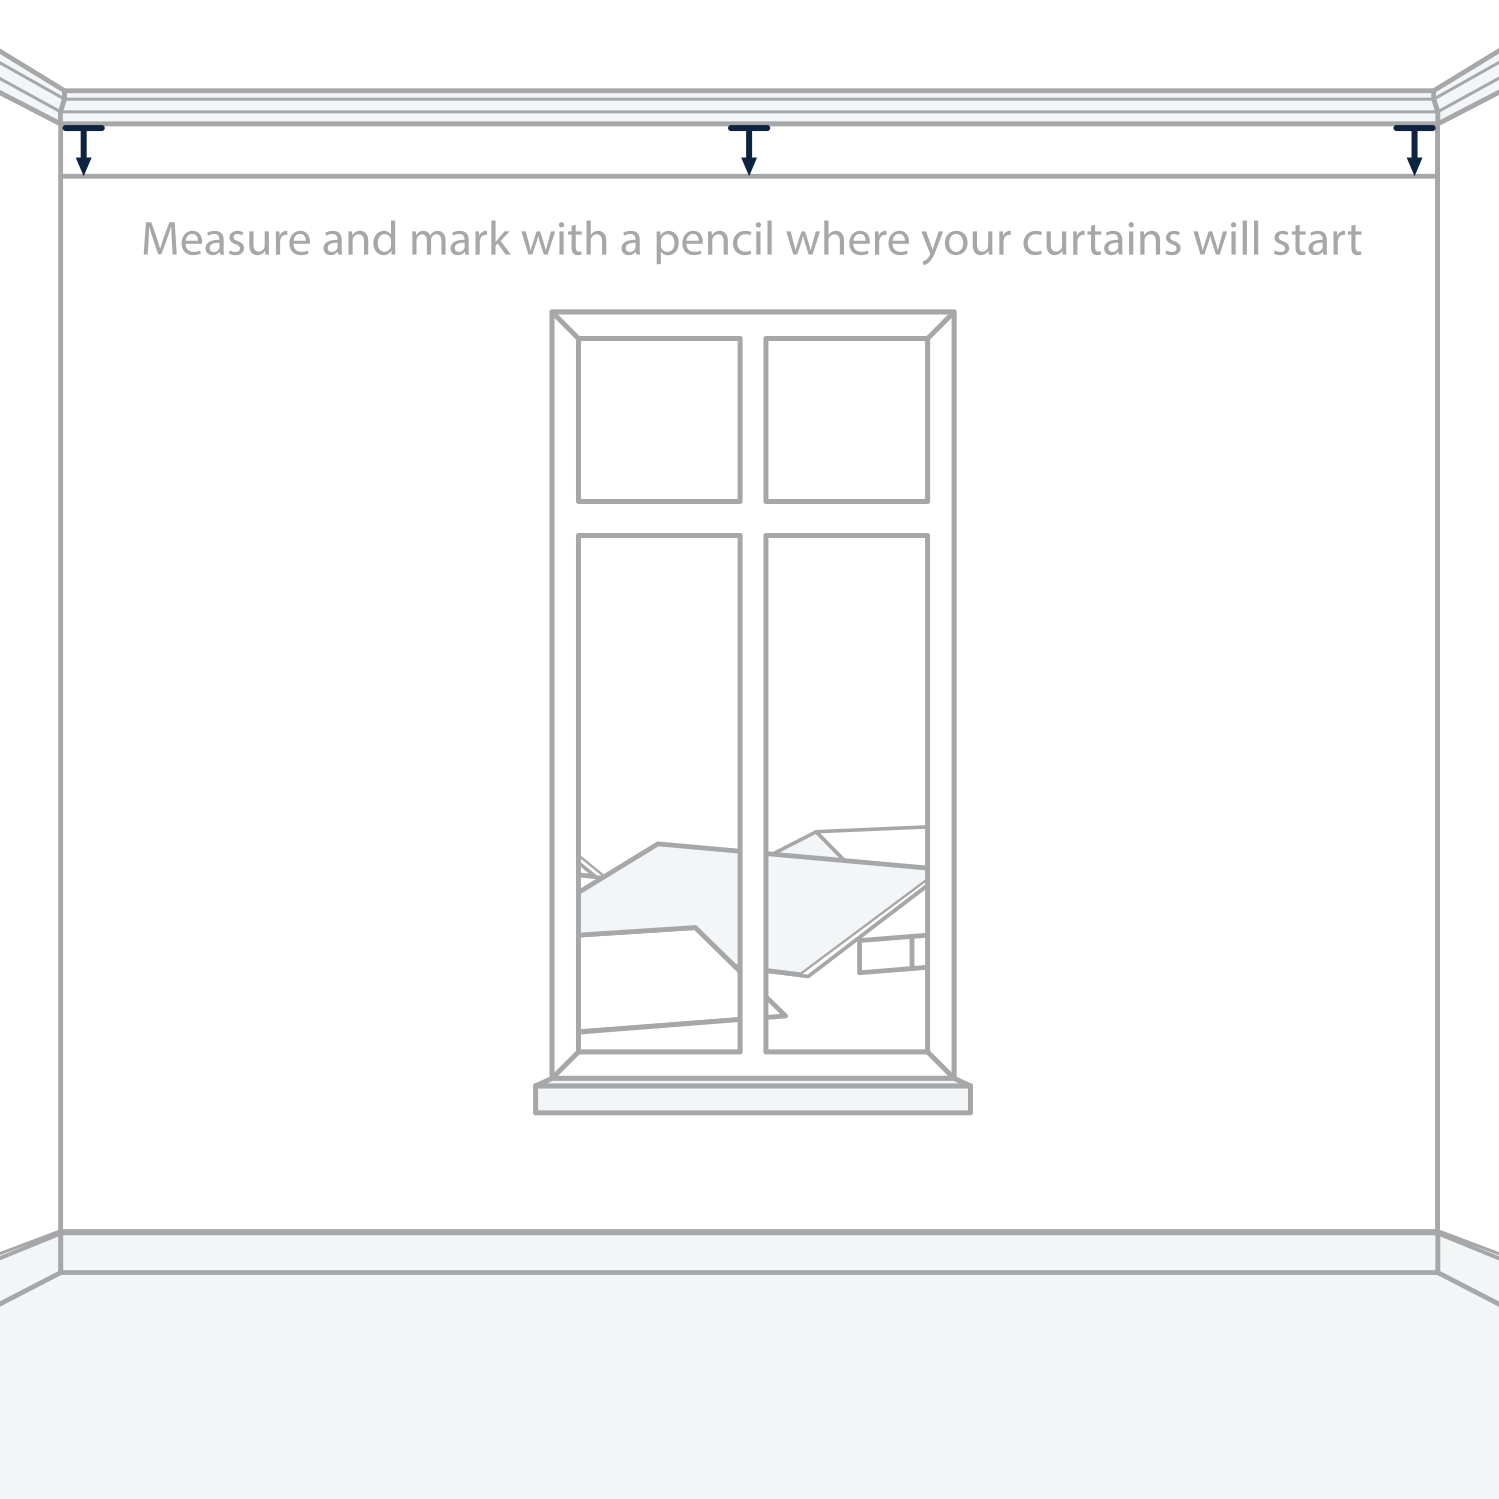
Using a pencil, mark the height where the top of your curtain track will be fitted. Use the ceiling or window frame as a guide to confirm the marks remain level across the full width.

For the best support, our trade team recommends fixing the track into wall studs wherever possible.

The dimension you provide should be taken to the top of the curtain track, not to the top of the finished curtain fabric. With S-fold curtains, there will naturally be a small gap between the track and where the curtain fabric begins.

3b

Find your drop dimension

To determine the correct curtain drop, follow these clear steps:

  1. Measure from the top of where your curtain track will be mounted down to the finished floor on the left, centre, and right sides of the opening. Record all three dimensions.

  2. Compare the dimensions and use the largest one as your curtain drop.

  3. If there is more than 10 mm difference between the three dimensions, our trade team recommends selecting a puddled finish to achieve the best result.

4

Select your preferred finish.

When designing and ordering your curtains, select from the three finish options below.

Enter your precise dimensions only. There’s no need to make any deductions or additions, as we’ll adjust your dimensions to achieve the right finish.

If you select Just Off the Floor, your curtains will be made approximately 5–10 mm shorter than your drop dimension, so they sit just above the floor.

If you select Touching the Floor, your curtains will gently skim the floor by up to 5 mm.

If you select Puddling, your curtains will puddle on the floor by approximately 20 mm. For a larger puddle, please leave a note in the comments section at checkout.

5

Select your stacking, and track flow.

Select the wand size you need. As a guide, the longer your curtain drop, the longer your wand should be for straightforward reach and everyday use.

Next, select your preferred stacking style: left stack, right stack, centre opening, or multiple openings. Consider which side is easiest to access, whether there are any obstructions, and which part of the window or door you’ll use most often.

If you select motorisation with centre opening curtains, select the side you would like the motor located on. Motorisation isn’t available for curtains with multiple openings, but we’ll confirm your motor fits without you needing to adjust your dimensions.

Finally, select between a fixed flow track and a free flow track. A free flow track gives you complete flexibility to move and stack your curtains as you like. Please note that motorisation isn’t available with free flow tracks.

6

Complete Your Custom Curtain Order Online

It’s time to complete your custom curtain order online. During ordering, you’ll be able to select your preferred hem finish. There’s no need to add or deduct anything for the hem — we’ll take care of this for you.

Simply enter the precise dimensions you have taken in millimetres (mm), without adjusting them for your chosen finish.

If you select the wall-to-wall option on the product page, we will make a small deduction from your track width so the track fits neatly between your walls or cornices. For ceiling fit curtains, a wall-to-wall installation typically provides the best result.

If you would like your curtains to frame the window opening, our trade team recommends a wall fit installation and adding at least 30% to the window opening width dimension. This can also work on a ceiling fit curtain. Confirm there are no obstructions on either side of the window according to your new track width.

While measuring this way, select standard fit on the product page, not wall to wall. Your track will then be made to your precise dimension so it frames the window opening beautifully. Please don’t make any deductions yourself.

Trade support

Need help before you submit the order?

Our trade team can help with product selection, unusual openings, measuring questions and installation planning. Send the job details and any useful site photos so we can give you a clear next step.

0
0
Your Cart
Empty CartYour cart is emptyReturn to Shop